Buy credits
Buy credits for your account or organization, from $10 to $1,000, by card, Alipay or WeChat Pay, with a promotional code if you have one.
Buy Credits is where you check what you can spend and buy more yourself. Anyone can buy credits for their own account, whatever their role, and admins can also buy for their organization. One credit equals one US dollar, and credits never expire. Credits and costs explains the model behind them.
What the page shows first
The page opens on Credits left, the same number as in the top bar. A badge next to it reads Active, Running low or AI features are off.
Under the big number, the page breaks it down:
- From [organization]‘s shared credits, today: what you may still take from the shared credits today. The line gives your daily allowance and what you’ve used of it, or says “No daily allowance set” when your administrator removed the limit.
- Your own credits: credits you bought for yourself. No daily allowance and no cap.
- Total you can spend right now: the two added together.
With a personal account, you only see your own credits.
Under $5, an amber box asks you to buy credits or switch on automatic top-up. At zero, a red box says AI features are off. If you’ve only used up today’s shared allowance, the box says so instead: it resets at midnight UTC, and your own credits have no limit.
Step by step
- Open Billing > Buy Credits.
- If you’re an admin, pick where the credits go. Two tabs show your organization and Your account, each with its balance. The organization is selected first. Everyone else buys for their own account and sees no tabs.
- Pick an amount. Click a preset ($10, $25, $50, $100, $250, $500 or $1,000), type whole dollars in Amount (USD), or drag the slider, which moves in $5 steps.
- Check the name under Invoice made out to.
- Pick a payment method under 2. Pay.
- If you have a promotional code, type it under Promotional code and click Apply.
- Before your first purchase only, tick the box to accept the Terms of Service.
- Click Buy $X of credits. The button reads Opening Stripe… and takes you to Stripe’s checkout page.
- Pay on Stripe, which then returns you to the Payment page.
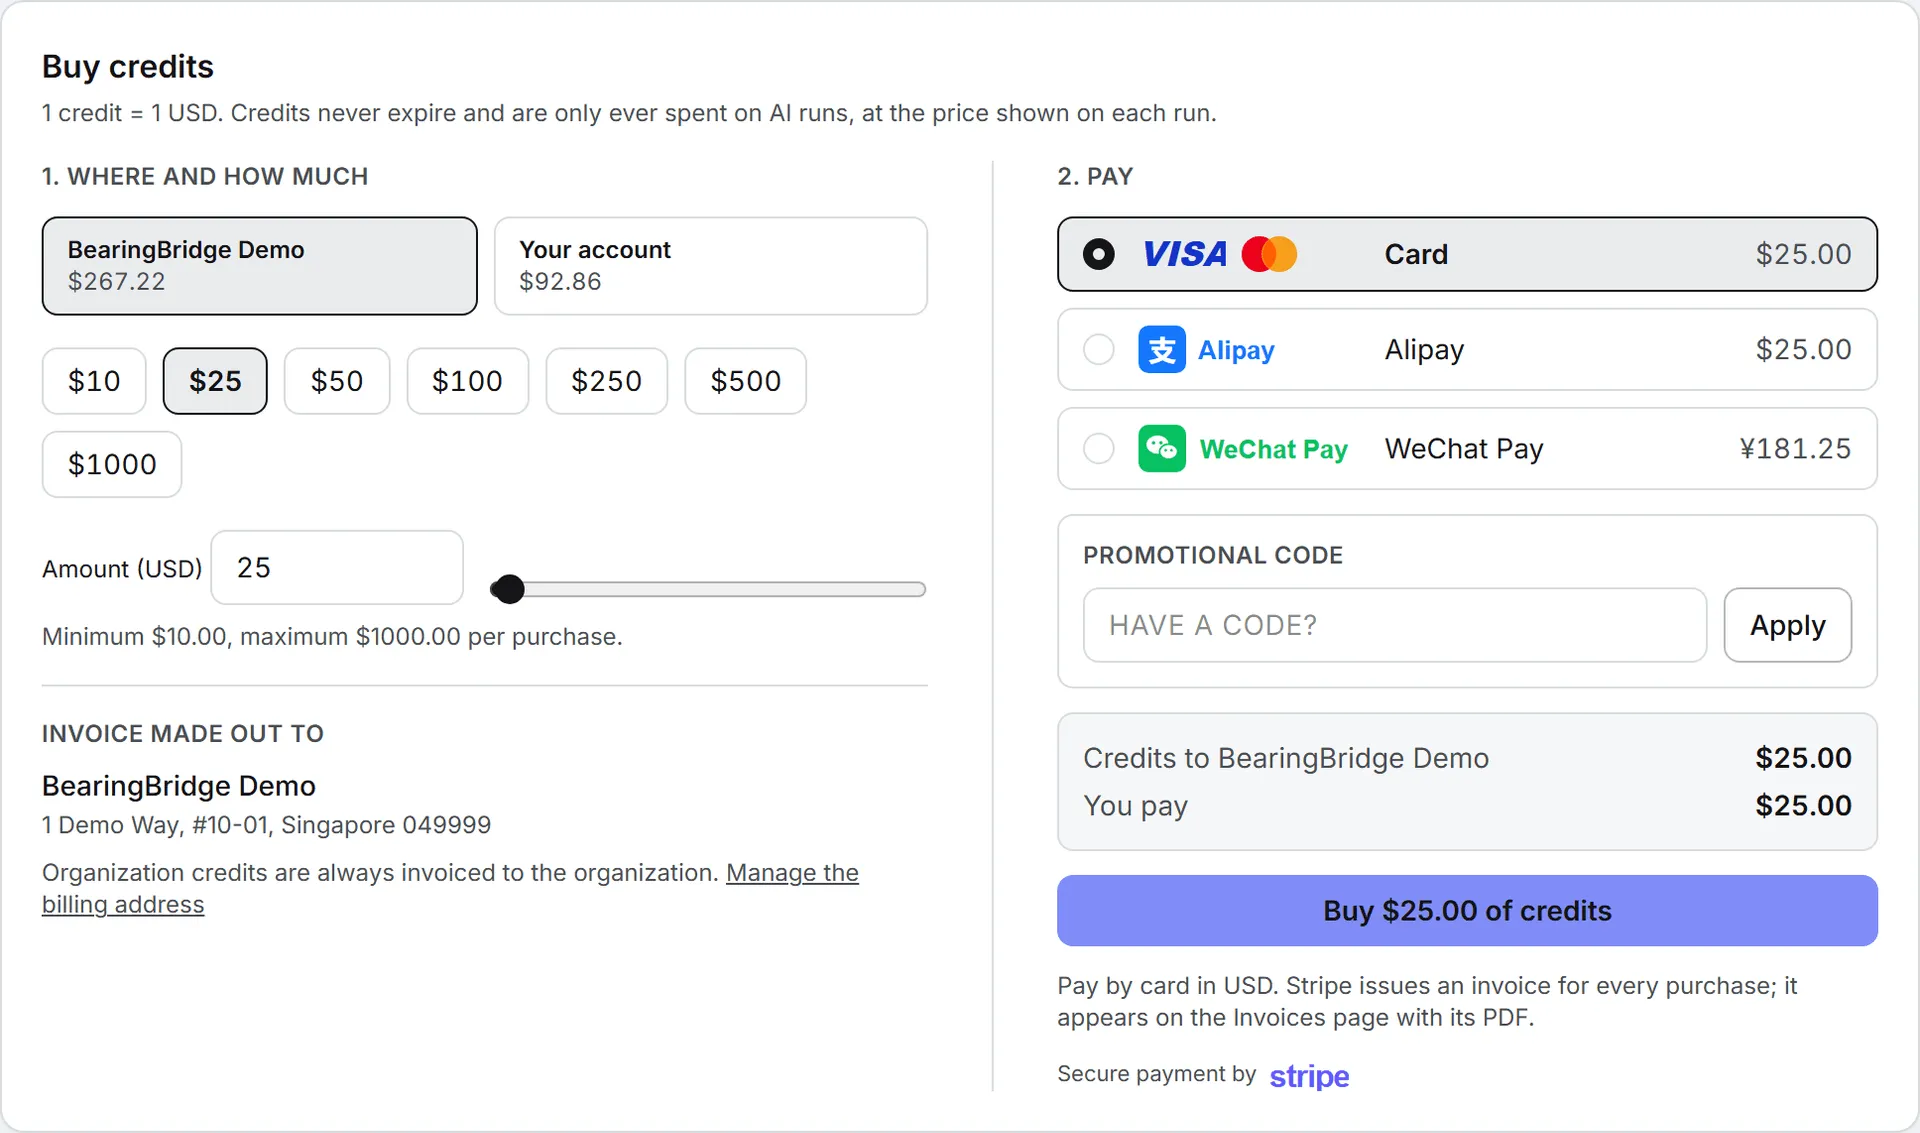
Any single purchase runs from $10 to $1,000.
Payment methods
The page lists the methods available, up to three. You type card details on Stripe’s own page, never in Intelligence.
| Method | Charged in | Notes |
|---|---|---|
| Card | US dollars | Visa, Mastercard and other international cards. |
| Alipay | US dollars | |
| WeChat Pay | Chinese yuan | Converted at a fixed $1 = ¥7.25. You receive the exact dollar amount of credits. |
A box above the button shows Credits to and You pay. With WeChat Pay, the button itself shows both, for example Buy $25.00 of credits · pay ¥181.25.
A card payment usually confirms in seconds; Alipay and WeChat Pay can take longer to settle.
There’s no fee on top. You pay the amount you picked (or its yuan equivalent with WeChat Pay) and receive exactly that amount in credits, plus any free credits a promotional code adds.
Promotional codes
BearingBridge hands out promotional codes from time to time. A code never changes what you pay. It adds free credits on top of the purchase, so you’re charged the amount you chose and a larger amount lands on the balance.
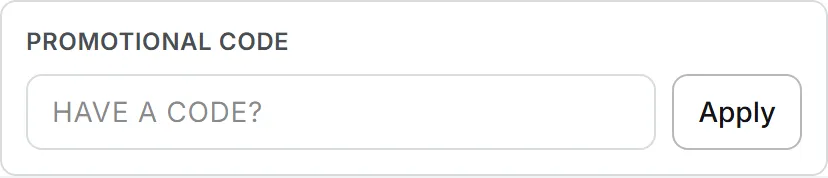
The box sits under 2. Pay, below the payment methods. Type the code into Have a code? and click Apply, or press Enter. The button reads Checking… while the code is looked up. Codes aren’t case sensitive, and what you type is put in capitals for you.
When the code is accepted, the box turns green and shows the code with what it gives you, for example ”+$25.00 of free credits”, and a line under it explaining the offer. Remove takes the code off again. The summary box above the button then carries four lines instead of two:
| Line | What it means |
|---|---|
| Credits to your account (or Credits to [organization]) | The amount you picked |
| Free credits from [CODE] | What the code adds |
| Credits you receive | The two added together |
| You pay | The amount you picked, unchanged |
Note: The Buy button keeps showing the amount you pay, not the amount you receive. Buy $100.00 of credits with a code that gives $25 still lands $125 on the balance. Check the summary box above it.
What a code can ask of you
Codes carry their own conditions, and the message under the field tells you which one you hit.
| What you see | What it means |
|---|---|
| “That promotional code does not exist.” | Check the spelling. |
| “That promotional code is no longer available.” | It was withdrawn. |
| “That promotional code is not open yet.” | Its start date hasn’t come. |
| “That promotional code has expired.” | Its end date has passed. |
| “That promotional code is not available on this account.” | It’s reserved for another organization. |
| “This code applies from $50.00 of credits.” | Raise the amount to at least the figure given. |
| “That promotional code has been fully used.” | It reached the number of uses it allows in all. |
| “You have already used that promotional code.” | It allows one use per person, and you’ve had yours. |
| “You have used that promotional code as many times as it allows.” | Same, for a code that allows several. |
| “That promotional code grants nothing on this amount.” | The offer works out to nothing at the amount you picked. |
The count of uses is kept per person, not per organization, so two admins of the same organization can each use a one-per-person code on the same shared credits.
One code at a time. Change the amount, or switch between your account and the organization, and the code is checked again for the new amount; if it no longer applies, the green box goes back to an empty field with the reason. A code you typed and then abandoned at Stripe is not counted as used.
When the free credits arrive
The free credits are added once Stripe confirms the payment, as a movement of their own called Promotional code in your credit history. The invoice is for what you paid: the bonus shows in its description, not in its total.
Promotional codes work on a purchase you make yourself. Automatic top-up never carries one.
Who the invoice is made out to
Credits bought for the organization are always invoiced to the organization, with the name and address on file. The BearingBridge team keeps those details. The Manage the billing address link opens Admin > Organization, which shows the billing contact on file. To change them, contact support.
Credits bought for your own account are invoiced to you. Your name and address for invoices are in Settings, in the Invoices section. If you haven’t filled them in, the page says so and the invoice carries your sign-in address instead. On the buy form, under Invoice made out to, admins of an organization can choose the organization, and the choice is saved for next time.
After you pay
Once you’ve paid, the rest happens without you. Stripe sends you back to the Payment page, which shows one of these headings:
| Heading | What it means |
|---|---|
| Payment successful | The credits are on your balance, free credits from a code included. A confirmation with the invoice is on its way by email. |
| Payment received | Stripe confirmed the payment. The credits are being added, which takes a few seconds. |
| Payment being confirmed | Alipay or WeChat Pay is still settling. The page keeps checking. |
| Payment cancelled, Payment not completed, Payment expired or Payment failed | Nothing was charged and your credits are unchanged. Try again takes you back. |
| Payment not found | The page couldn’t read the payment. If you did pay, the credits and invoice still arrive. |
If Stripe has a record of the payment, the page lists the credits, the amount charged, the method, the date, the invoice, a receipt link and a reference. A purchase made with a promotional code carries one more line, Code [CODE] with the free credits it added. The page also shows the credits you can spend now.
What adds the credits is Stripe’s confirmation, not this page. So if you paid and then closed the tab, they still arrive.
Paying from mainland China
Important: When the page sees you’re in mainland China, from your connection or your device’s time zone, a notice appears above the Buy button. The Stripe payment can take up to 2 minutes there. Keep this page and the Stripe page open until you land back. Closing the tab can cut the payment. So can a refresh, or a switch to another network.
If you’d rather not pay through Stripe, BearingBridge can issue a fapiao: you pay in China in RMB, and your account is credited. Write to hello@bearingbridge.com with the amount you want.
Receipts and emails
Stripe issues an invoice for every purchase. You’ll find it, with its PDF, on the Invoices page.
An email with the subject “AI credits added” confirms each purchase with the amount and your new balance, plus links to the invoice. It goes to the person who bought. For organization credits, the organization’s billing email gets it too.
Troubleshooting
The Buy button is grayed out. Tick the Terms of Service box. It appears only before your first purchase.
I can’t find my organization in the tabs. Only admins buy for the organization. Buy for your own account, or ask an admin.
The payment failed. Nothing was charged. Click Try again on the Payment page, or pick another method.
I paid but see no credits. Wait a few seconds and reload. Then check the Invoices page. The credits are added once Stripe confirms, which can take a few minutes with Alipay or WeChat Pay.
My code was refused. The message under the field says which condition you hit. The most common one is an amount below the code’s floor: raise it and click Apply again.
The free credits aren’t on my balance. They’re added with the purchase, once Stripe confirms, as a Promotional code line in the credit history. If the purchase is there and the bonus isn’t after a few minutes, contact support with the code and the invoice number.