Manage brands
Administrators create brands on the Brands page, set their website, logo, markets, languages and capabilities, set their brand voice and look, and delete old ones.
The Brands page is where administrators create brands, set them up and remove them. A brand is a website plus its markets and languages, and those settings drive defaults across the app: which Google country rankings are checked in, which language content is drafted in and which areas its dashboard shows.
Before you start
- You need the Admin role. Open the Admin menu and pick Brands.
- Every brand belongs to exactly one organization. All its members see it and work on it, whatever their role. No other organization ever sees it.
Find your way around the list
The band at the top shows four figures: Brands, People (the members of your organization, who all work on every brand), Markets (countries covered, with their codes) and Areas live (capabilities switched on across the portfolio).
Under it, a toolbar sticks to the top as you scroll. Search by name, website or owner, and the brand count reads “3 / 28” while the search narrows the list. Sort orders brands by Name (A → Z), Areas enabled or Markets covered, and a switch shows them as Cards or as a Table. The page remembers your layout and sort in this browser.
Each brand card shows its logo or initials, its name, its website, the owner (“Run by”) and a gauge such as 5/8 for the areas switched on. Below that come chips for each capability, then Languages and Markets. The first language and the first market are marked as primary.
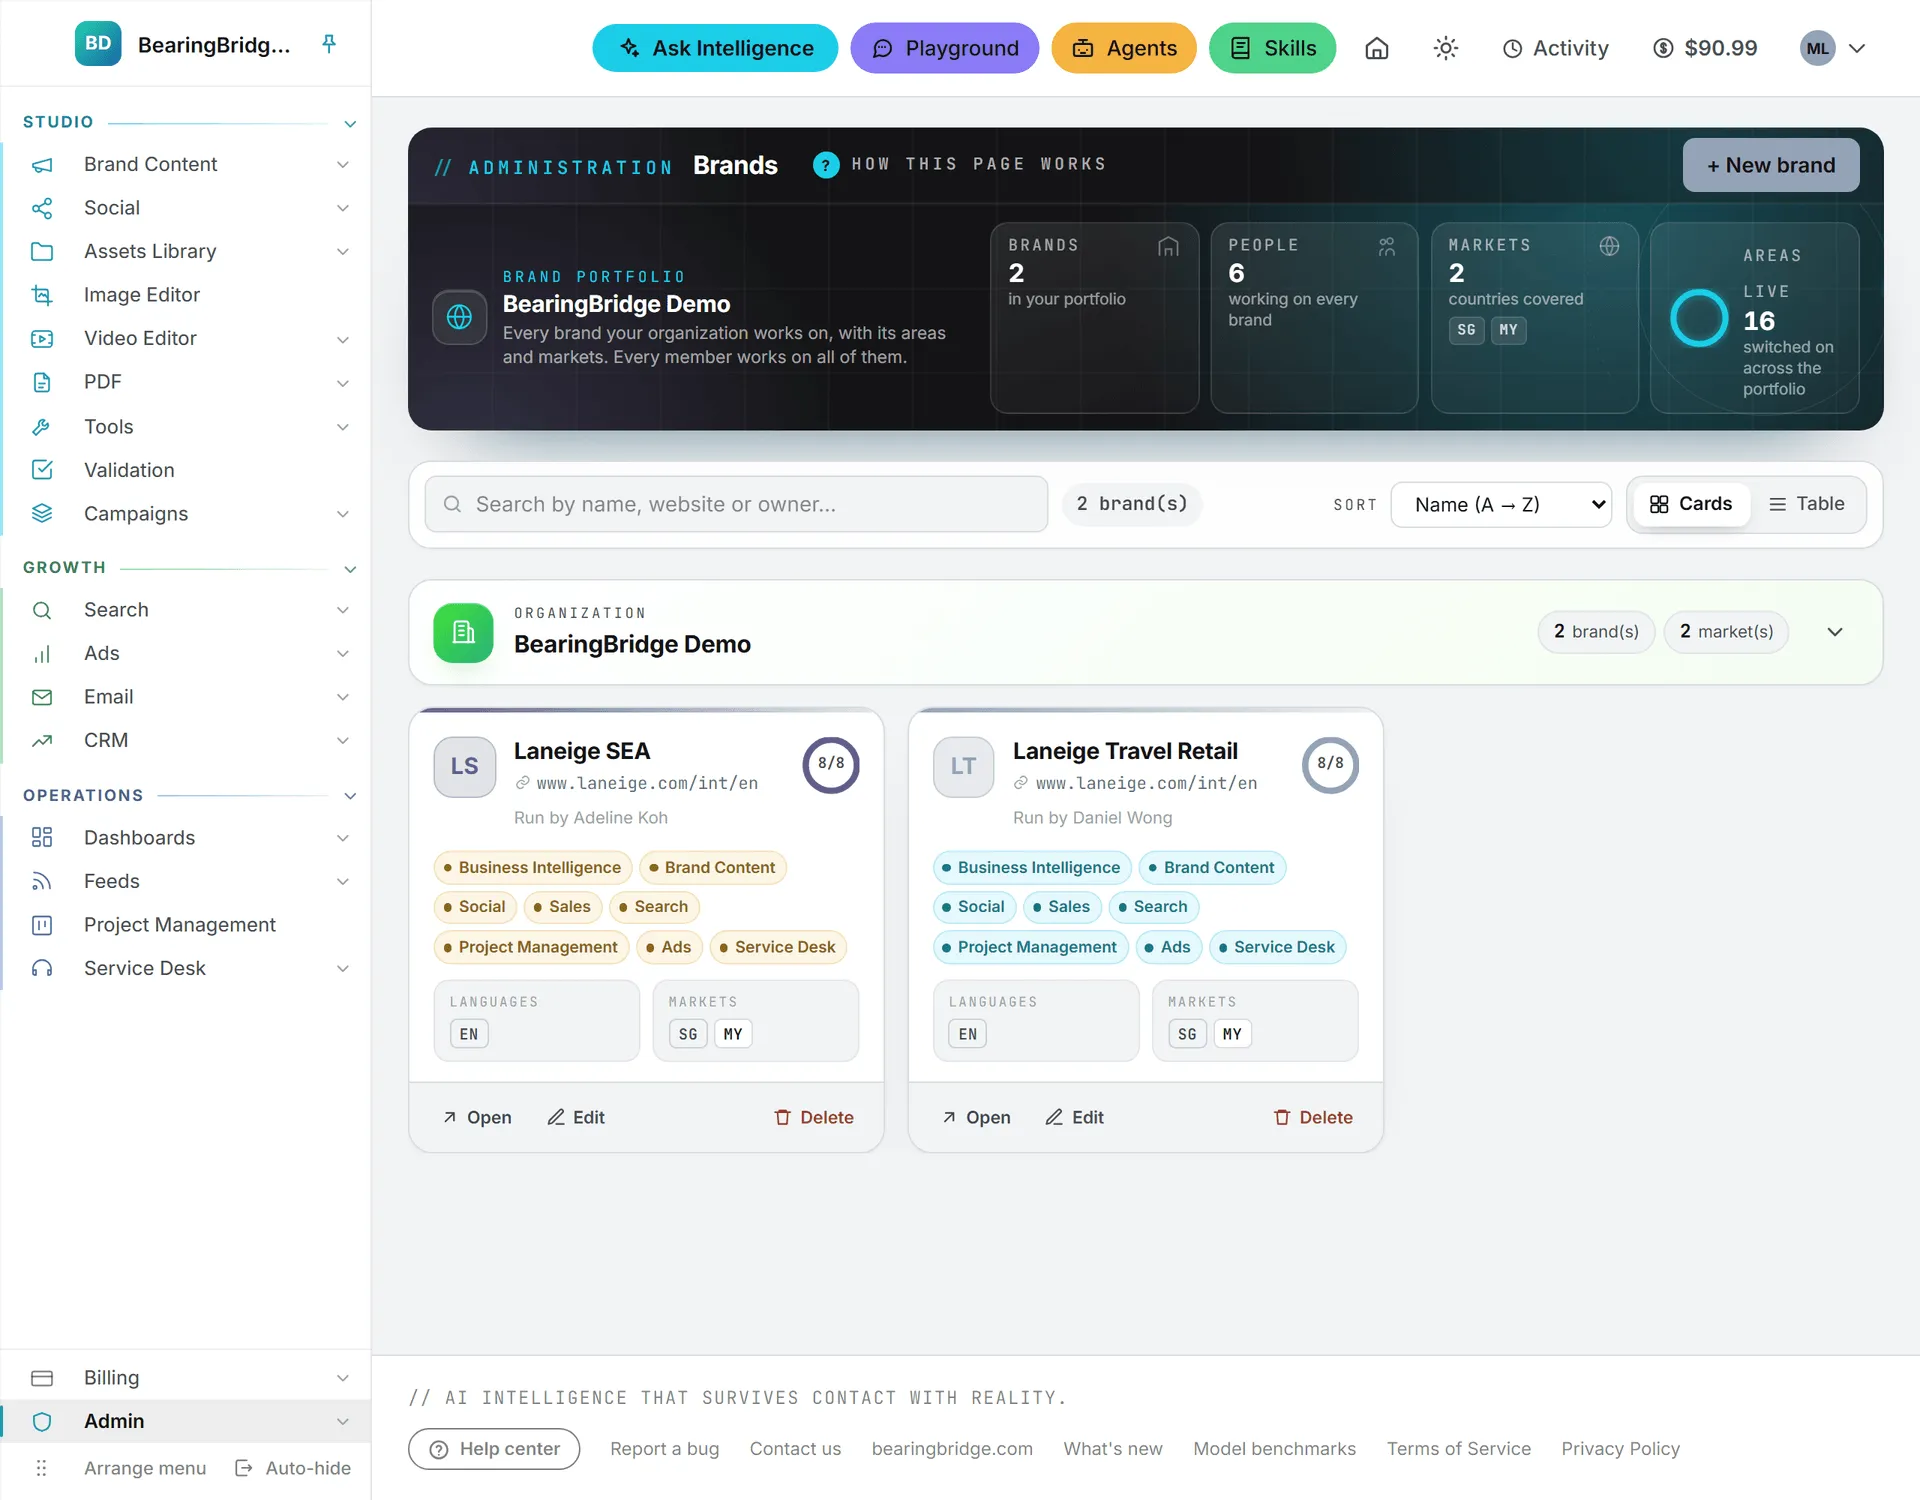
Three actions close each card:
| Action | What it does |
|---|---|
| Open | Opens the brand’s details in the editor and makes it the active brand in your browser. A middle click opens it in a new tab. |
| Edit | Opens the brand editor |
| Delete | Deletes the brand and its data |
The No brand workspace, which holds work tied to no brand, never appears on this page. The brands concept page explains what it’s for.
Create a brand
- Click + New brand in the page header.
- In Identity, type the Brand name and the Website. Both are required.
- Fill in the other sections now or come back later. Only the name and website are needed to create it.
- Click Create brand.
A new brand starts from what your organization owns: every capability the organization has is on, and nothing else. Once created, the editor reopens on the brand, so you can draft its guidelines with AI. You can change the name, the website and every other field later with Edit.
The brand editor
The editor has six sections, but only two fields are required. Skim the ones you don’t need today.
When you open a brand, the editor takes the place of the list. The brand sits in the page address, so you can reload or share the link, and your browser’s back button closes it. A band on top previews the brand as it will look in the app’s header.
A rail on the left switches between sections, one at a time. One Save changes button saves them all. Saving keeps you in the editor, and a green Saved confirms it. Close asks before dropping unsaved changes.
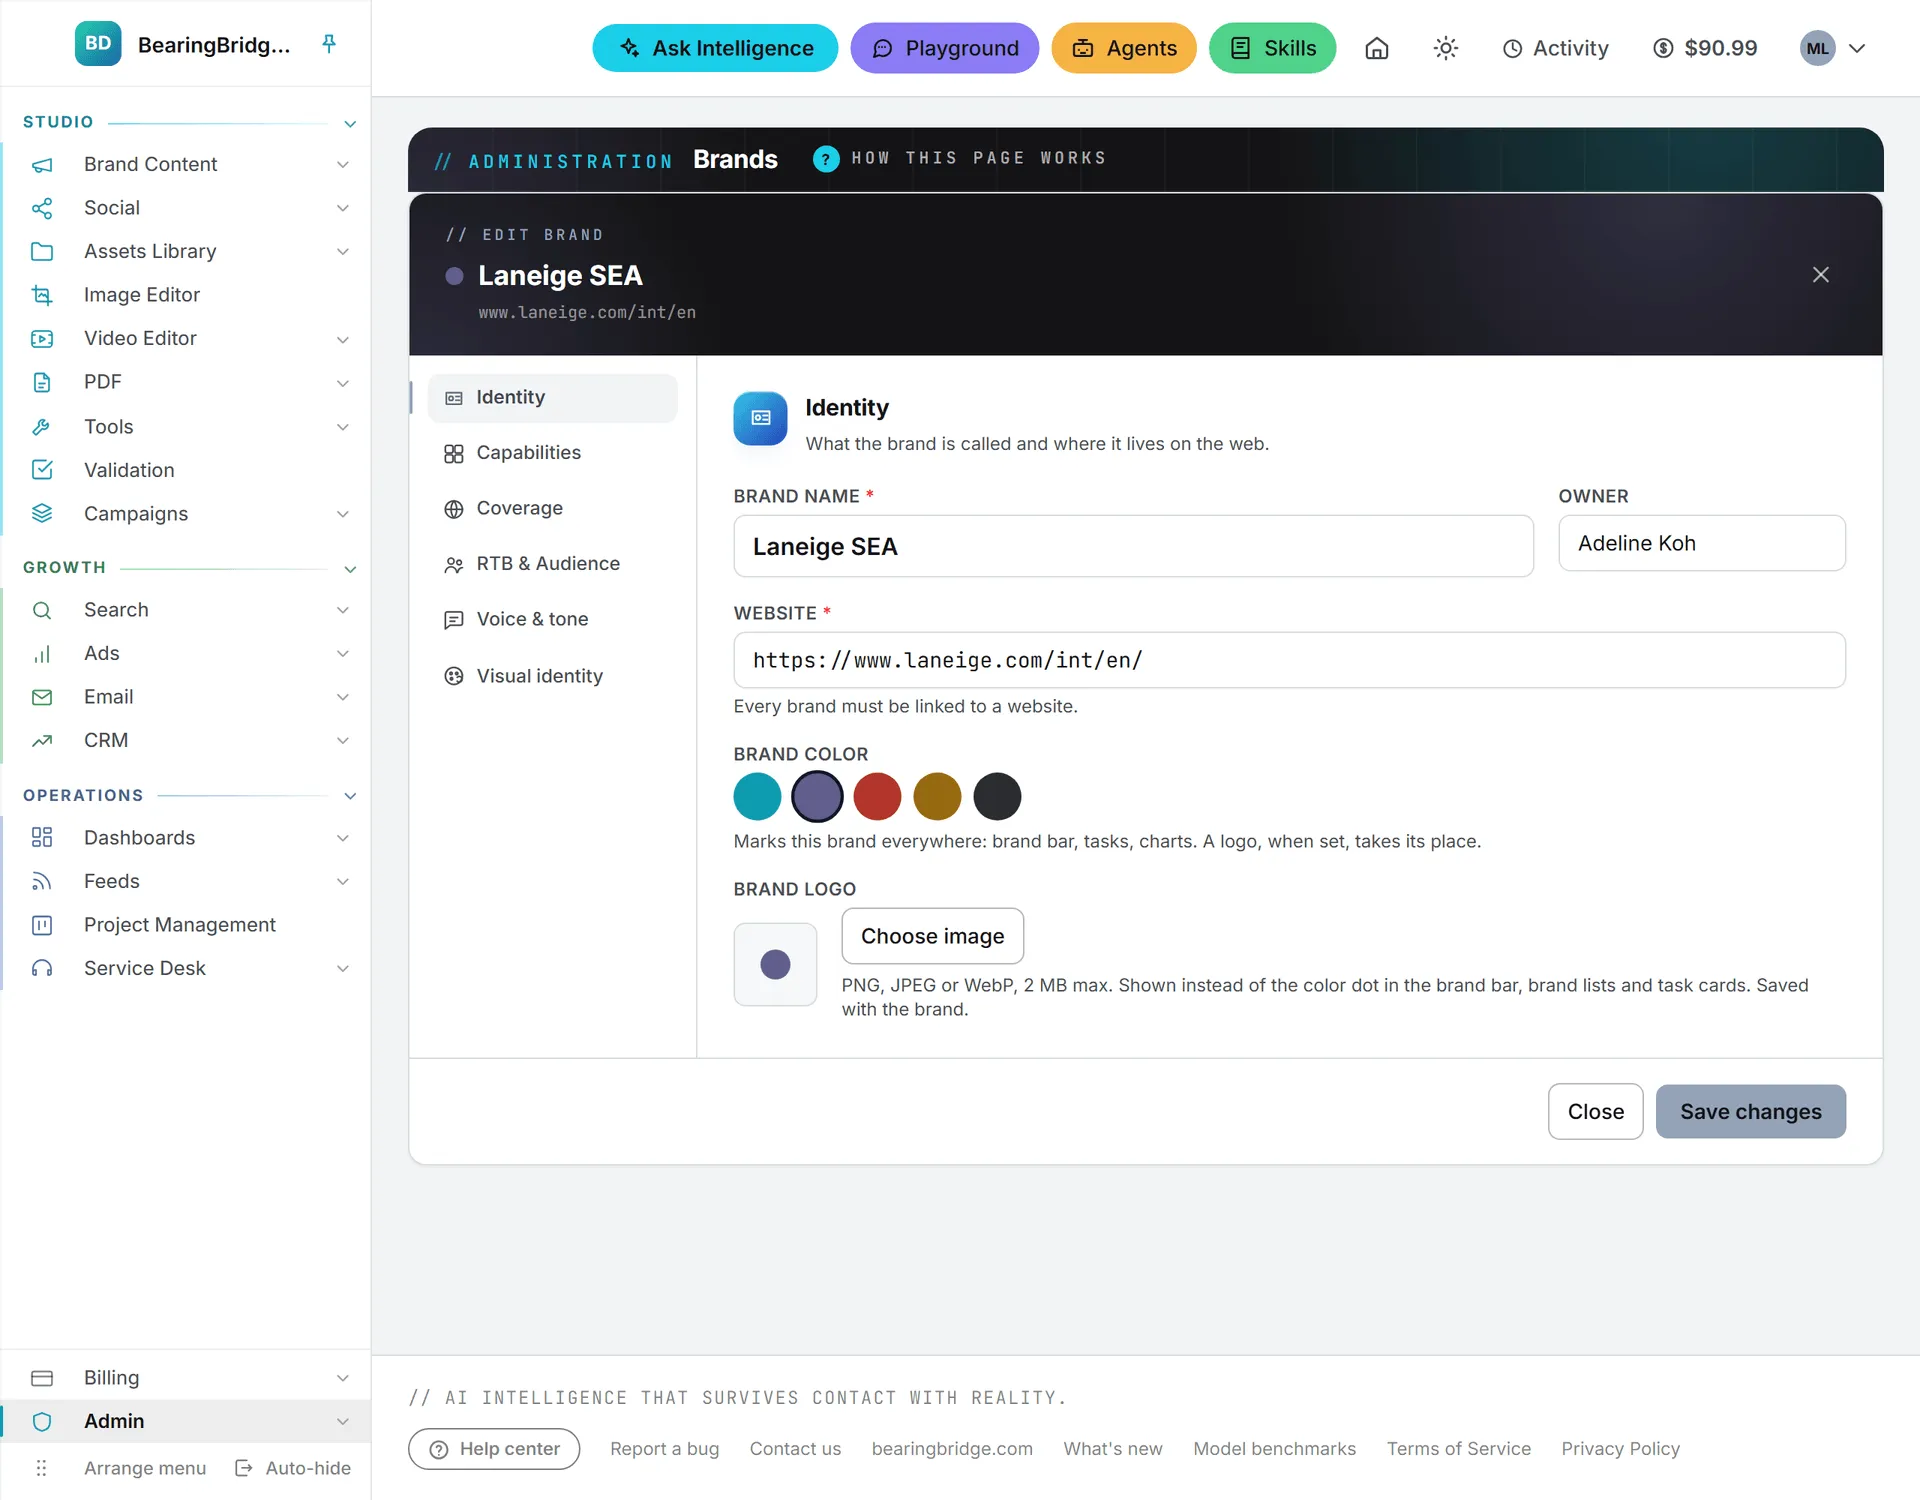
Identity
| Field | Notes |
|---|---|
| Brand name | Required |
| Owner | Free text, shown as “Run by” on the card |
| Website | Required. Every brand must be linked to a website. |
| Brand color | Blue, Purple, Red, Orange or Slate. Marks the brand in the brand bar, tasks and charts. |
| Brand logo | PNG, JPEG or WebP, 2 MB max. Shown instead of the color dot. |
Click Choose image to pick a logo. It’s scaled down to fit a 512-pixel square, transparency kept, and uploaded when you save. Remove takes it off.
Capabilities
Each capability has a master switch. Off, that whole area disappears while this brand is the active one. Inside a capability that stays on, you pick the modules this brand uses:
| Capability | Modules you can switch per brand |
|---|---|
| Search | Google Search (SEO), AI Search |
| Ads | Google Ads, LinkedIn Ads |
| Brand Content | Content Plan, Content Reports, Image and Video (grouped under Content), Market Monitor |
| Social | Calendar, Content, Reporting |
| Sales | CRM |
| Business Intelligence, Project Management, Service Desk | Master switch only |
A brand can only narrow what its organization owns. A capability the organization lacks is locked, with the note “Not enabled for this organization.” Ask the BearingBridge team to add it. The same switches for every brand at once are on Capabilities.
Coverage
Pick the Languages (32 on offer) and Markets (more than 200 countries) the brand works in. The markets list has a country filter, and your picks show as chips above it, the first one tagged primary. The primary market sets the default location for rankings, ads geo-targeting and AI search, and the first language is the default for content.
Get the primary market right first: the Search and Ads screens start from it. The order of your picks decides which one is primary. To change it, remove the current primary with the × on its chip and tick it again: it moves to the end.
RTB & Audience
Three optional text fields: Target customers, Precise targeting and Reason to buy. They show on the dashboard and help the AI write sharper briefs and campaigns.
Voice & tone and Visual identity
These two sections hold the brand’s guidelines: how it sounds and how it looks. Social posts, articles, briefs, ad copy, reports and the service desk assistant all follow them. Each has a Review status of Draft or Approved.
On a brand that doesn’t exist yet, the section says to save the brand once first. On a saved brand, Draft with AI fills the sections from a page address or an attached brand book PDF. The visual identity bar needs a reference. Nothing is kept until you save the brand. This drafting is paid: the model picker shows each model’s cost before you run it. Read Brand foundation for the full guide.
Delete a brand
- Click Delete on its card.
- Read the warning and confirm.
Important: Deleting a brand can’t be undone, and it takes the brand away from everyone in the organization.
The brand’s own data goes with it, such as keywords, ranking reports and ads snapshots, and so does its logo. Tasks belong to the organization, so they stay and lose only their brand tag. If the brand was your active one, your browser forgets it. The No brand workspace can’t be deleted.
Who can do this
| Action | Who |
|---|---|
| Create, edit and delete brands | Administrators, in their own organization |
| Move a brand to another organization | The BearingBridge team |
| Work on a brand | Every member of the organization, within what their role allows |
| Use this page and the brand editor | Administrators only |
Access to the page also follows the Brands rights in the roles table. See roles and rights.
What it costs
Creating and editing brands is free. Drafting guidelines with AI costs credits, shown next to each model before you run it. The rest of the price list is in What costs credits.
Troubleshooting
“A website is required: every brand must be linked to one.” Fill in the Website field in Identity.
“Only administrators can edit brands.” Your role is below Admin. Ask an administrator to make the change.
A capability switch is grayed out. Your organization doesn’t own that capability, so no brand can use it. The BearingBridge team can add it to your organization.
“The brand was saved but its logo could not be updated.” The brand is saved. Try the logo again, with a PNG, JPEG or WebP under 2 MB.