First steps for members
New to your organization? Set your name and time zone, pick a brand, check your credits, connect your accounts, then open dashboards, Ask and tasks.
You’ve just joined your organization, in whatever role your admin picked. The eight steps below take you from a blank profile to your first answer. Some depend on what your organization uses, so skip any that don’t match your menu.
If you run the organization yourself, first steps for admins is the list for you.
1. Put your name and face on the account
Open the menu under your picture, top right, and click User Settings. In the Your name card, type your First name and Last name and click Save. It’s the name colleagues see wherever you show up in the app, and the one the app’s mails greet you by. Your sign-in address doesn’t change here: it still identifies the account.
If your next sign-in asks for a code sent by email, that’s your organization’s two-step sign-in; sign-in and security explains it and how to trust your own computer.
The Profile picture card directly below puts a photo in the header; square ones look best. Password changes and the rest of that page are in profile and password.
2. Set your time zone and formats
A little further down Settings, the Date and time card sets how every date and time is written for you: lists, calendars, schedules and the mails you receive. Pick a Time zone, or leave Follow this device to use your computer’s. Choose a Date format and a Time format, then click Save. The page reloads with the new format.
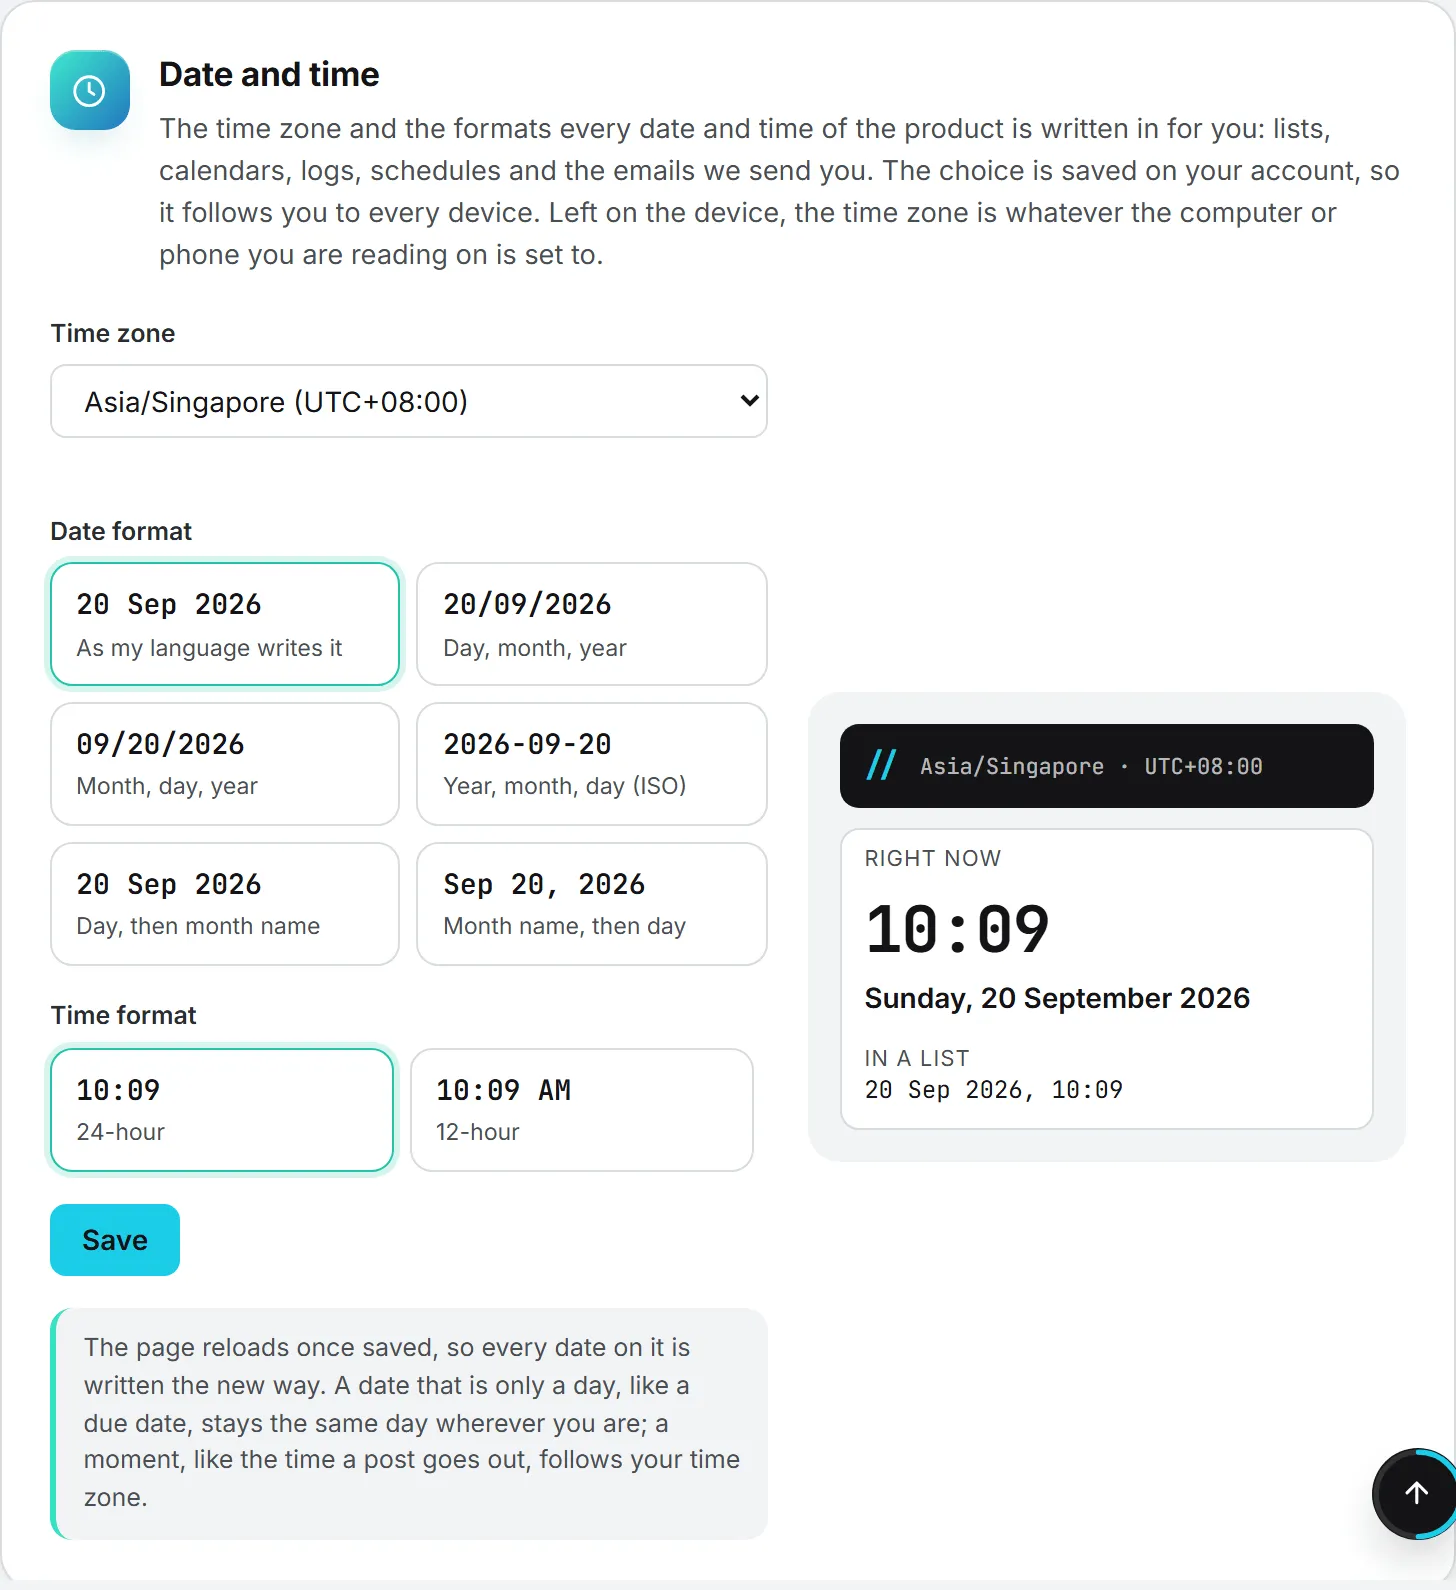
A due date stays the same day wherever you are, while a moment such as a post’s publishing time follows your time zone.
If your organization offers more than English, the Language card switches the interface, and Appearance picks light, dark or your device’s setting. Both are explained in date, time, language and theme.
3. Pick the brand you work on
The brand picker sits at the top of the left menu. It lists No brand, for work that belongs to no brand, then the brands your admin gave you access to. Pick one and the page filters to it, and your browser keeps that choice for the next page.
A brand you expected isn’t in the list? Access is granted brand by brand, so ask an admin of your organization. More in brands.
4. Check your credits before you run anything
AI and data runs are paid from credits, and the amount in the header, next to the coin icon, is what you can spend right now. Hover it to see the two parts: your daily allowance on the organization’s shared credits, and any credits of your own.
Important: A new member’s allowance starts at zero. If the header reads Buy credits, either ask an admin for a daily allowance or buy credits for yourself on Billing > Buy Credits. Credits you buy are yours and have no daily cap.
Paid actions show their price, before the run or in its result, and the header balance drops by the same amount. Billing > Usage lists what you ran and what it cost. Credits and costs explains the two pots, and what costs credits lists the paid actions.
5. Connect your own accounts
Your account is set up. The last four steps put it to work.
My Connections, in the same profile menu, holds what you plug in under your own name. Nobody else in your organization can reach it, admins included.
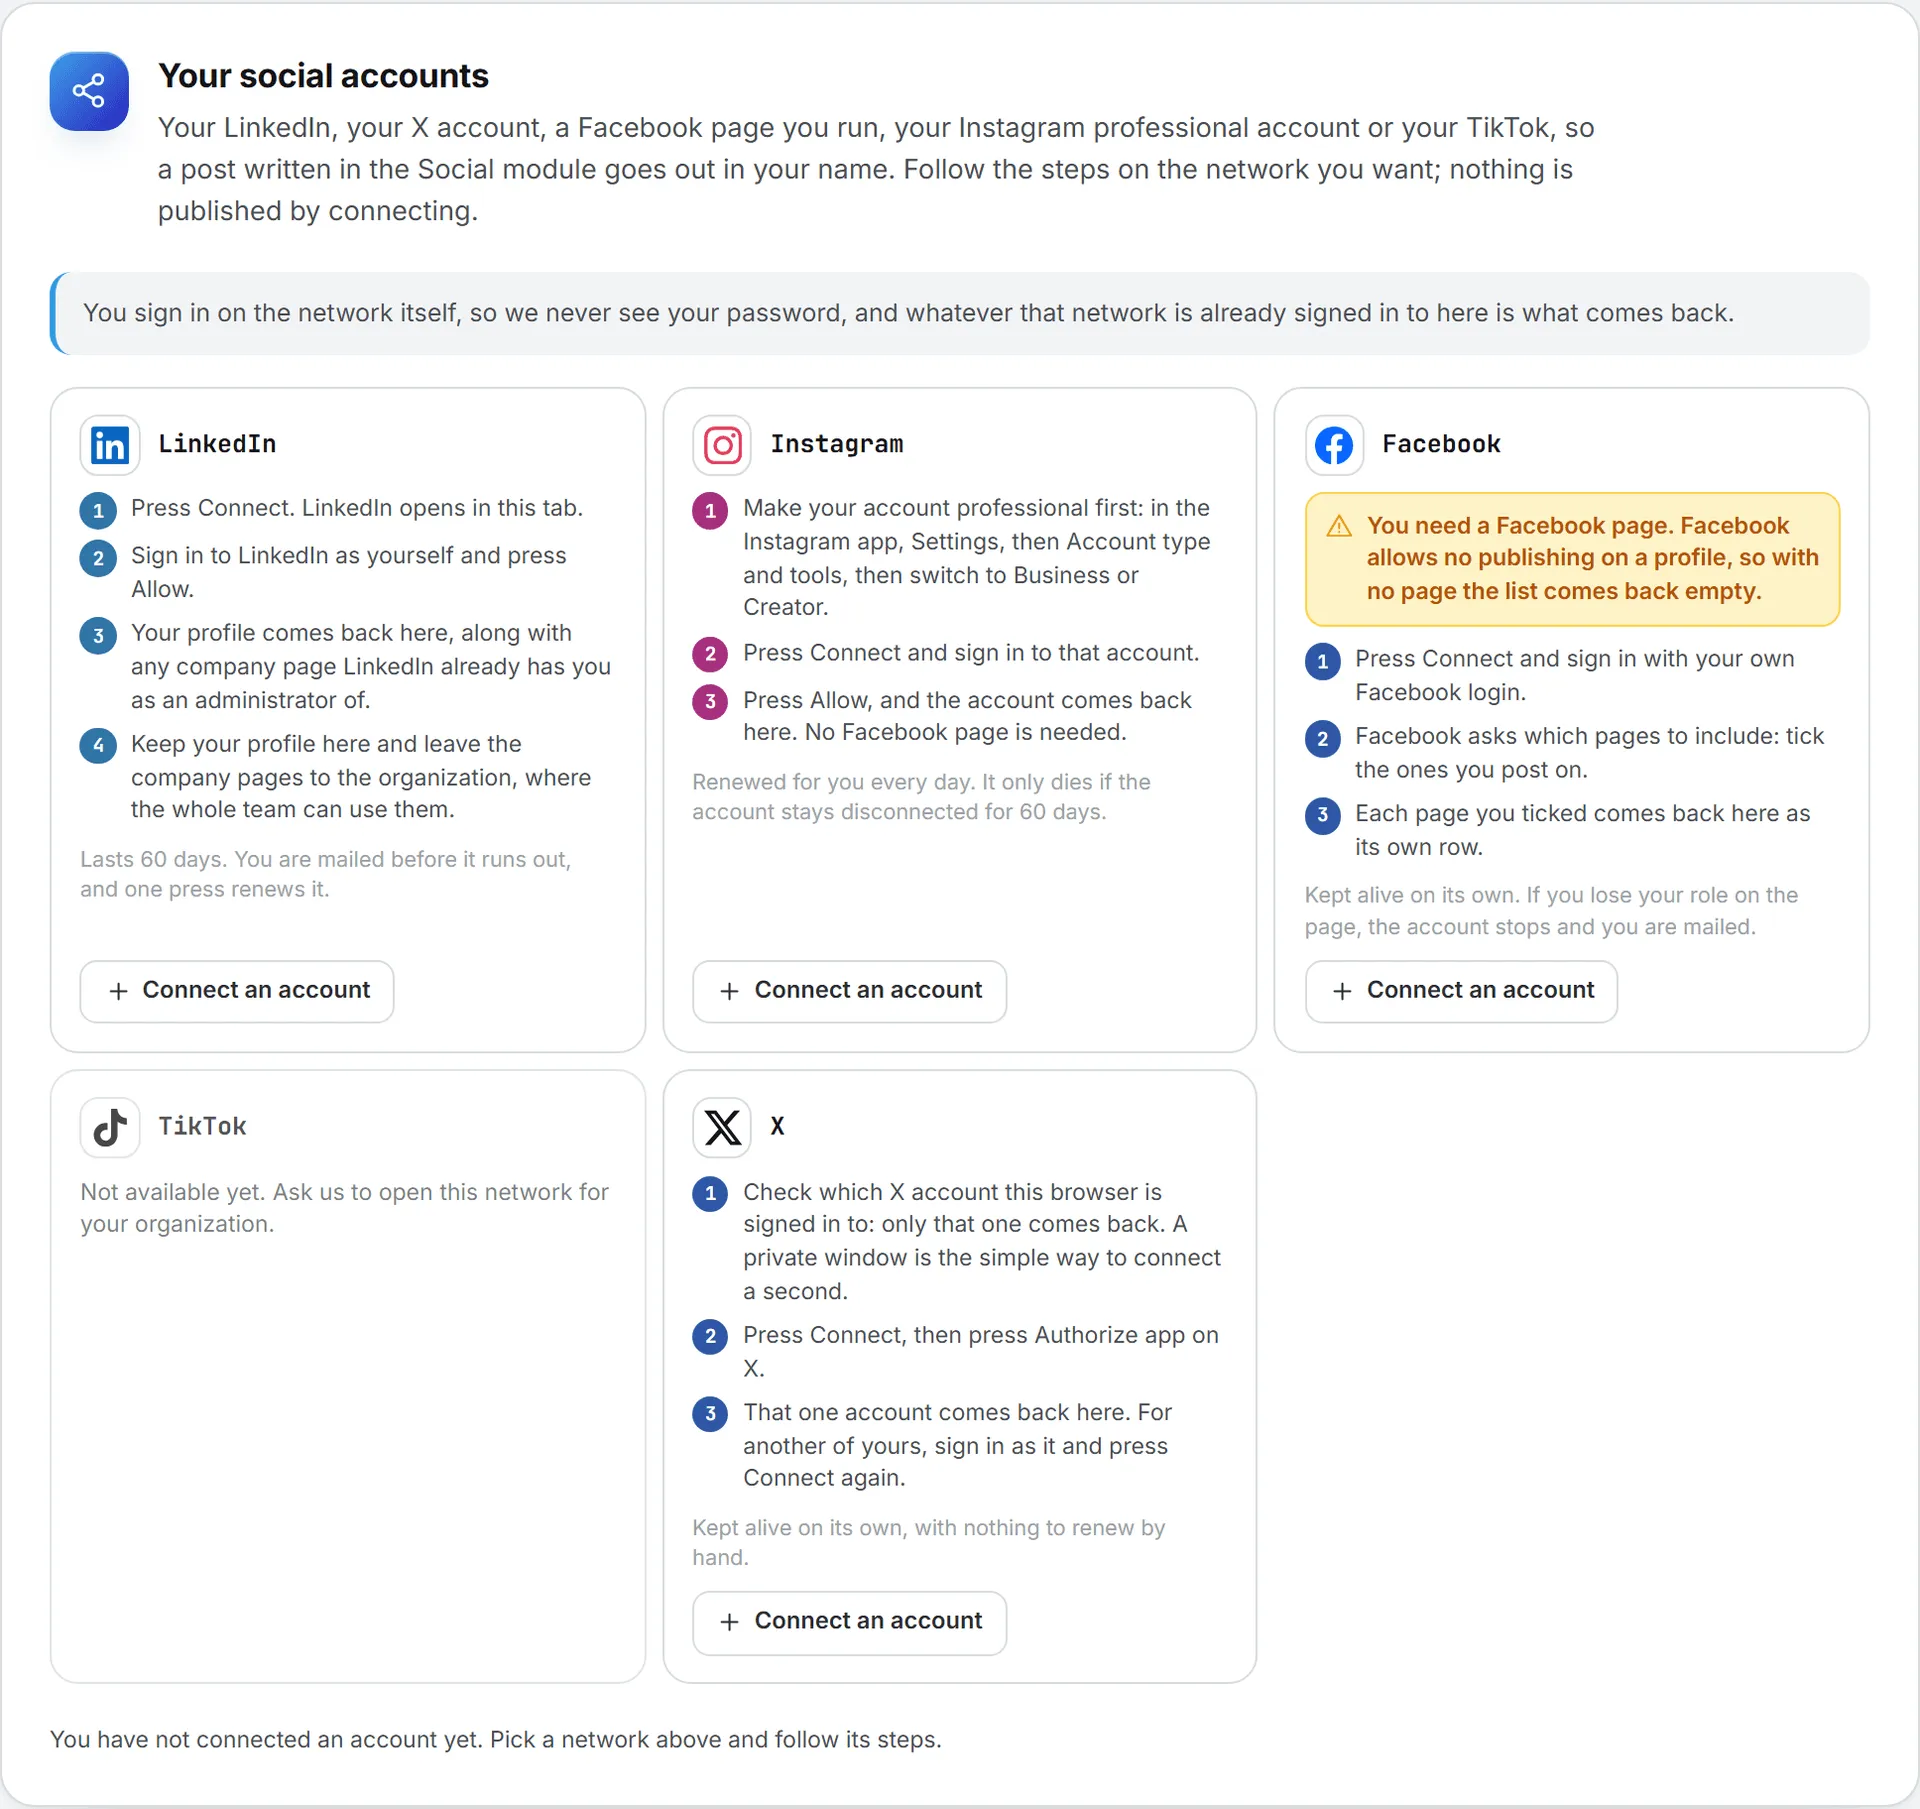
The page shows only the channels available to you. Under Your mailbox and your spreadsheets, you can connect Gmail and Google Sheets so Ask Intelligence and your agents can read them. If your organization has Social, Your social accounts connects your LinkedIn, your X account, a Facebook page you run, an Instagram professional account or your TikTok, so posts you write go out in your name. Connecting an account doesn’t publish anything, and each network’s card walks you through its own steps. See my connections.
6. Open your first dashboard
Unless you’ve chosen another home page, signing in drops you on the first dashboard under Business Intelligence. The dashboards in that group (Visibility, Watchers, Content, Commercial and Delivery) appear when you have the areas they read. Visibility and Content follow the brand picker; the rest cover the whole organization. Without Business Intelligence, you land on Feeds instead, the news reader every account has.
Start with the Business Intelligence overview and feeds, the one module every account has.
7. Ask your first question
Click Ask Intelligence in the header, which opens its own page. Type a question the way you’d ask a colleague, for instance about a brand’s content or your open tasks. The answer comes from the data you have access to, and from any systems connected for you.
Before sending, Data included in the page header lets you leave parts of your data out of the conversation. Type @ to point at one library folder or document. Web search, when your admin allows it, lets the answer use the web too. Each question is a paid action, and its price shows under the answer. Conversations are saved, so you can pick one up again later. Read Ask Intelligence.

8. Find your tasks
Open Project Management in the menu, then the My tasks tab next to Board. It lists everything assigned to you across the projects whose team you’re on, plus personal tasks, marked with a lock, that only their author and the assignee can see. If Project Management isn’t in your menu, your organization doesn’t use it; skip this step. The board itself is covered in my tasks.
Where to go from here
Finding your way tours the rest of the screen, from the menu you can rearrange to the house icon that makes any page your home page.