First steps for admins
Set up a new organization in ten steps: check modules, create brands, invite and grade your team, fund credits, pick models, connect systems, secure sign-in.
You’re the admin of a new organization and want it ready before your team arrives. Here are ten steps, in the order that saves the most back-and-forth. Most of the pages involved sit under Admin at the foot of the left menu, which only people with the Admin role see.
On a personal account you’re the only member, so there’s no Users or Credits page and nobody to invite. Skip steps 4 and 5, and in step 6 buy credits for yourself on Billing > Buy Credits.
1. Look over your organization
Open Admin > Organization. The dark band at the top counts your credits, brands, users and projects. Below it, the Modules card lists every area of the app and whether your organization has it, marked On or Off.
You can’t change that list yourself; the BearingBridge team sets it. If an area you need reads Off, contact support. The rest of this page is covered in organization settings, and steps 9 and 10 come back to it.
2. Understand capabilities
Admin > Capabilities is a grid of areas against your organization and its brands. A person reaches an area only when three levels agree: the organization (set by the BearingBridge team), the brand (the rows under it, which you can tick and save), and the person, set on their page in Users.
Right now there’s little to change, since a new brand starts with whatever the organization has. Come back here once your brands exist. The full rules are in capabilities.
3. Create your brands
In Admin > Brands, create one brand per website you work on. A brand carries a website, its markets and its languages, and they set defaults across the app. Rankings, for example, are checked in the brand’s Google country, and drafts are written in its language. Switch off the modules a brand won’t use, so they drop out of the menu while it’s selected.
The brands article walks through every field, including the Team button that shares a brand with people.
4. Invite your team
Want to adjust what roles can do before anyone joins? Do step 5 first.
- Open Admin > Users and scroll to Invitations.
- Click + Invite a colleague.
- Fill in First name, Last name and Email, pick a Role, and set a Daily allowance ($) if they’ll spend shared credits.
- Click Send the invitation.
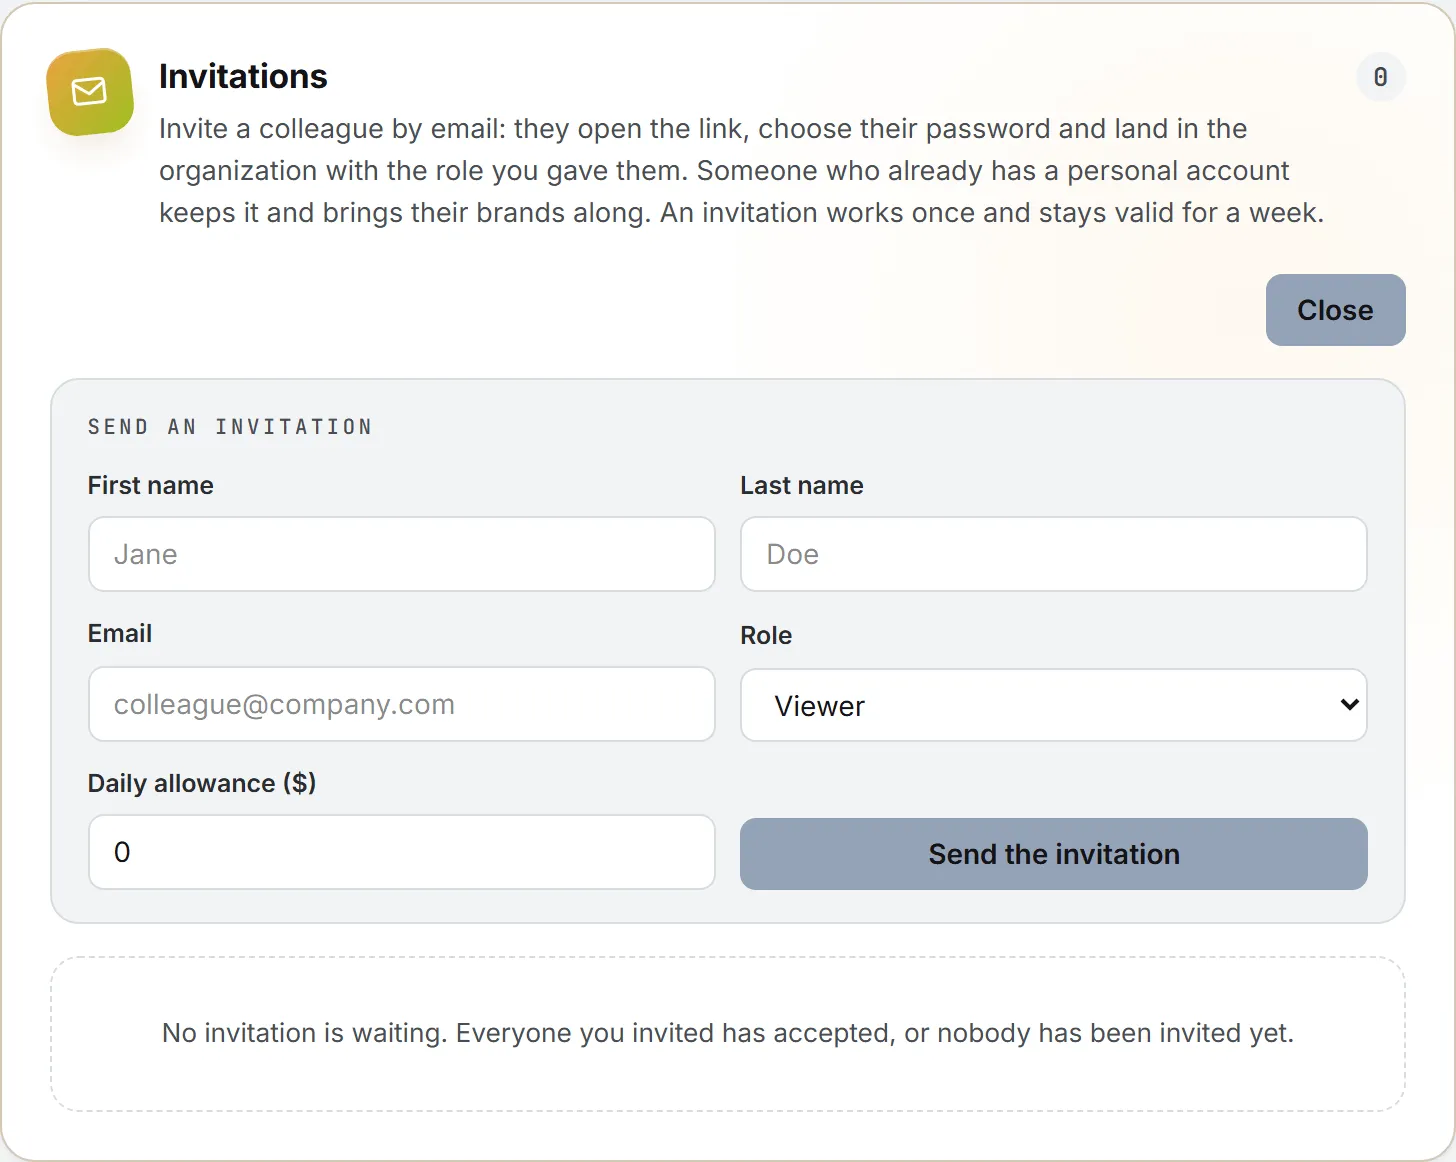
Your colleague gets a mail with a link that works once and lasts 7 days. They choose a password and land inside your organization. Someone who already has a personal account signs in instead, and their brands move in with them. Pending invitations stay listed with their expiry date. Sending a new one to the same address replaces the old link, and Revoke cancels one.
When people have joined, open each person’s page and grant the brands they work on. Details in users and invitations.
5. Grade the roles
The Roles card, on the same Users page, sets what each role may see, create, change and delete, area by area. Admin, Brand Manager, Editor and Viewer ship with the app. You can adjust their rights, or click + New role to make your own, which then shows up in the role list when you invite or edit someone.
A role can never open an area your organization doesn’t have. Roles and rights explains the grid.
6. Fund the shared credits
With people and rights in place, the second half is about money, models and the systems around you.
AI and data runs are paid from credits, as credits and costs explains. Your organization has one shared balance, and only an admin can buy credits into it, on Billing > Buy Credits.
The page takes a card, Alipay or WeChat Pay, and can top the balance up automatically from a saved card; buy credits and automatic top-up have the steps.
Then give members a daily allowance. It’s set person by person on their page in Users, and Admin > Credits shows the same figures from the wallet’s side: what’s left, and what each person drew today. The monthly spend cap shown there is changed only by the BearingBridge team. How the pot and the allowances interact is in shared credits.
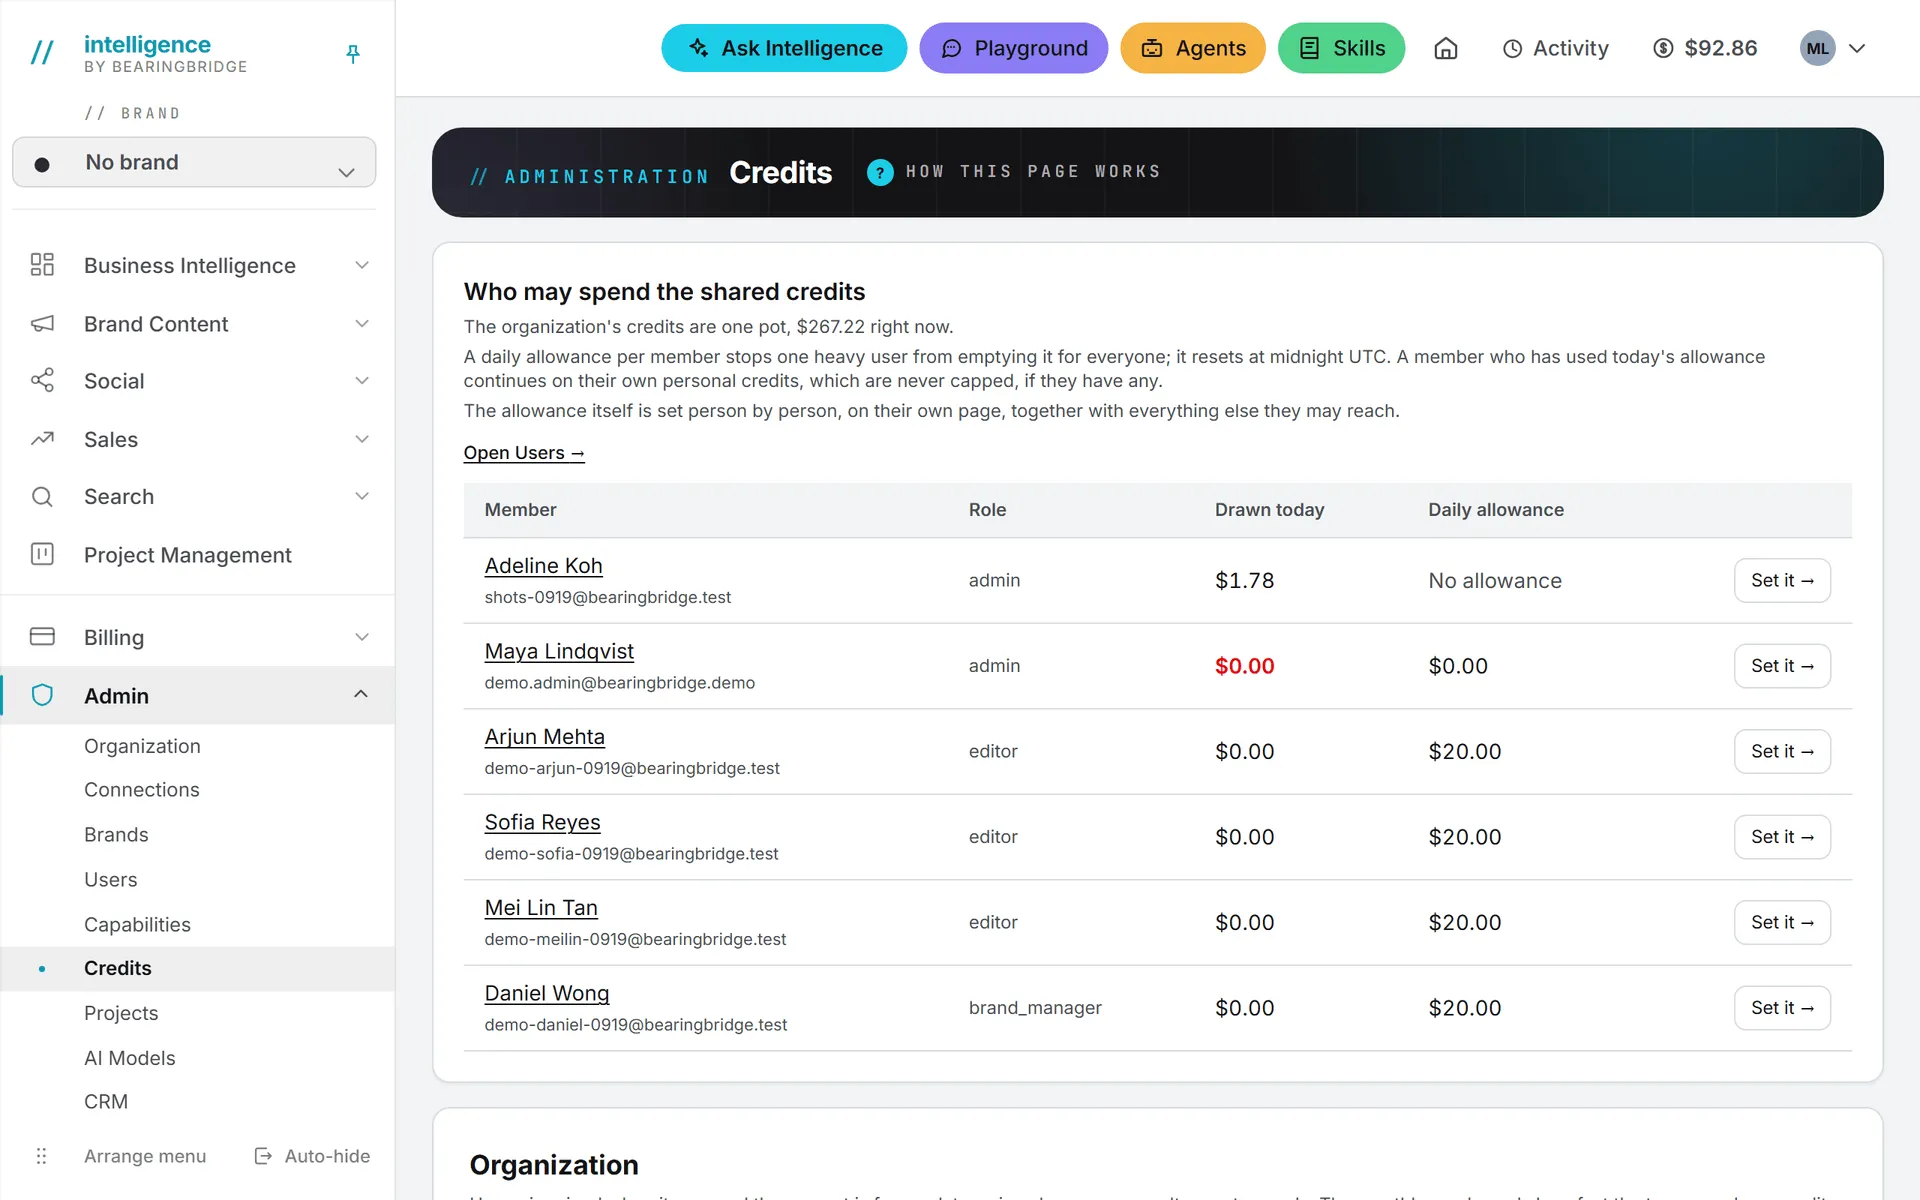
Important: An invited member starts with an allowance of zero. Until you raise it, AI features won’t run for them unless they buy credits of their own.
7. Choose the AI models
On Admin > AI Models you decide, module by module, which model runs by default and which others people may pick next to the button that runs the feature. Each model is listed with its price. You can go down to single pages with Set by page. Leaving a row on its default means it follows the level above. The AI models article has the full picture.
8. Connect your systems
Admin > Connections plugs in systems you already use, a CRM or a spreadsheet, say, so Ask Intelligence and your agents can read live data from them. Connections only read: nothing is written back. Admins read them all. Anyone else needs you to grant each connection on the Users page.
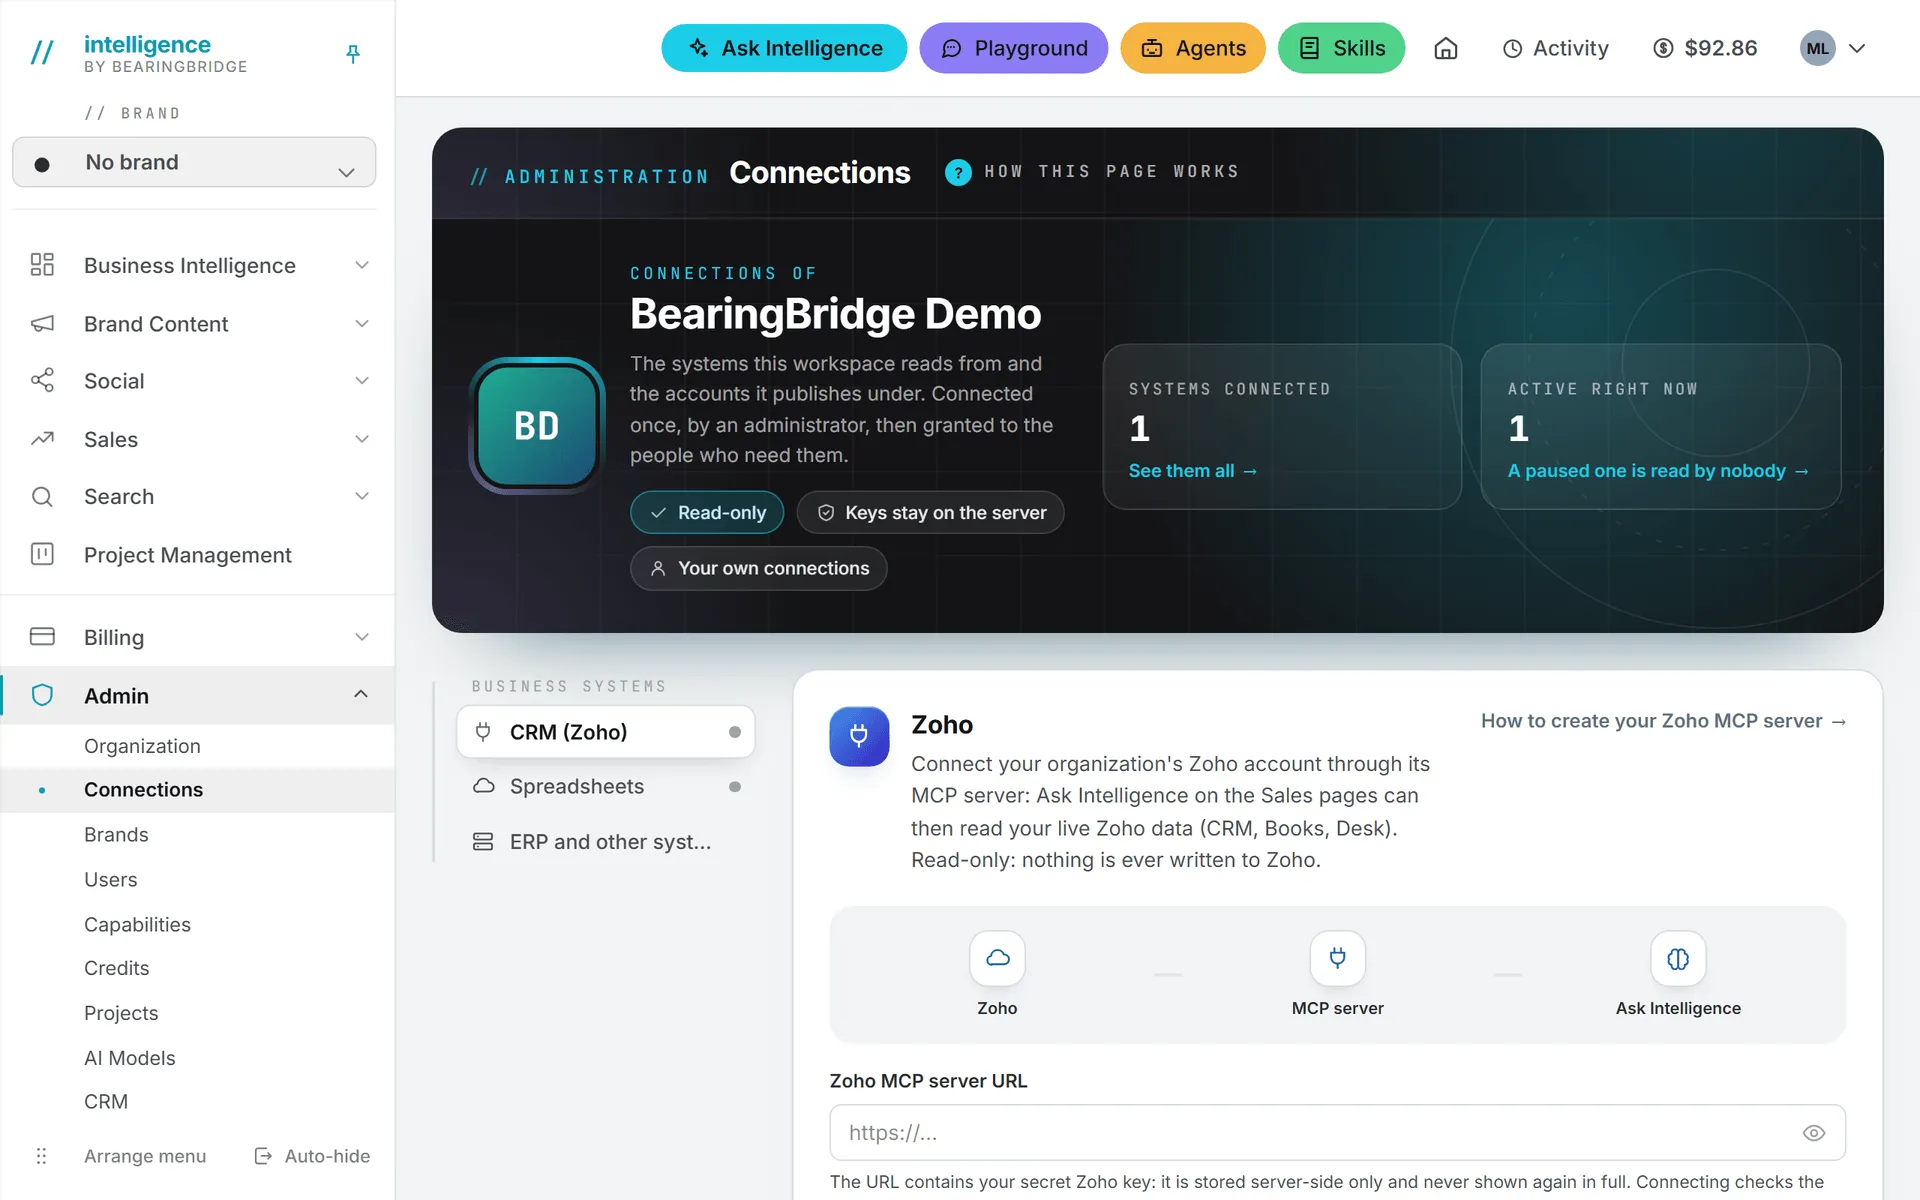
One thing you won’t find here: social accounts. Each person links their own on My Connections. The connections article covers both kinds.
9. Offer interface languages
Back on Admin > Organization, the Interface languages card lists English, always on, then French and Chinese. Tick the ones your team should be able to pick and click Save languages. Members see the change on their next page load, and their language switch appears in the profile menu. Only the interface changes: content and data stay in the language they were written in.
10. Decide on two-step sign-in
The Sign-in security card on the same page holds Code by email at sign-in. In a new organization it’s already on, so every member confirms a mailed code after their password. Keep it, or untick it and click Save security. While it’s on, anyone who loses access to their mailbox is locked out, so make sure at least one admin has an address you can always reach. Before you decide, read sign-in and security.
When you’re done
Two Admin pages weren’t on the list because not every team needs them on day one: Projects, where you staff project teams for Project Management, and CRM, the Sales settings, which appears when your organization has Sales.
The welcome page at /welcome shows a short version of this list, and your team has a checklist of its own in first steps for members, worth sending to each new colleague.