Create and set up a desk
Open a service desk for a brand, fill in every setting, test answers in the phone preview, switch it live, move it or delete it.
This article explains how to create a service desk and set it up, then how to test it, move it and delete it. It’s meant for the editors, brand managers and admins who run desks.
Before you start
- The Service Desk must be switched on for your organization, and you need editor-level rights or above to create or change a desk. See Roles and rights.
- Pick the brand in the header. A new desk belongs to the brand selected there.
- Decide who the desk is for. It works best with one audience per desk, such as customers, resellers, a product line or a market.
- Gather the documents it should answer from: FAQ, policies, manuals. See Build the knowledge base, brands and capabilities and modules.
Create a desk
- Open Service Desk > Desks in the left menu.
- Click New desk in the dark band, or go to the dashed Open a new desk card. It names the brand the desk is for.
- Type a Desk name, for example “Reseller support”. Up to 120 characters.
- Click Create desk.
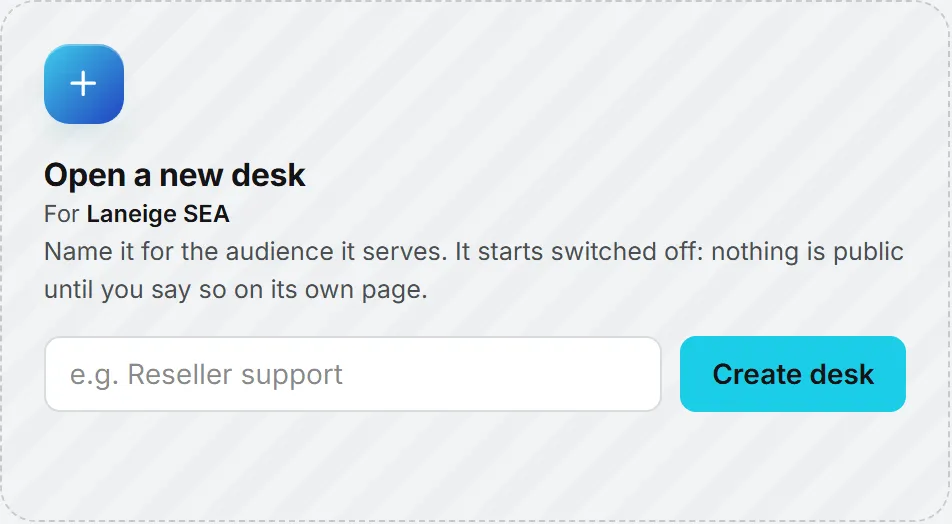
You land on the new desk’s page, and the desk now has its own entry under Service Desk in the menu.
The new desk starts switched off. Nothing is public until you switch it on and save.
To find it later, use its entry in the menu, the Desks page, or the desk picker at the top of any desk page, which lists every desk of the same brand.
The app builds the slug, the short name that ends the public address, from the desk name. Slugs are unique across the whole product, so if the name is already taken elsewhere, the app adds a number. You can change it on the desk page.
Every desk setting
Open the desk, then the tab called The desk. The Settings view holds a card titled This desk. Every field is saved together by Save settings. As soon as you change something, the button turns amber until you save.
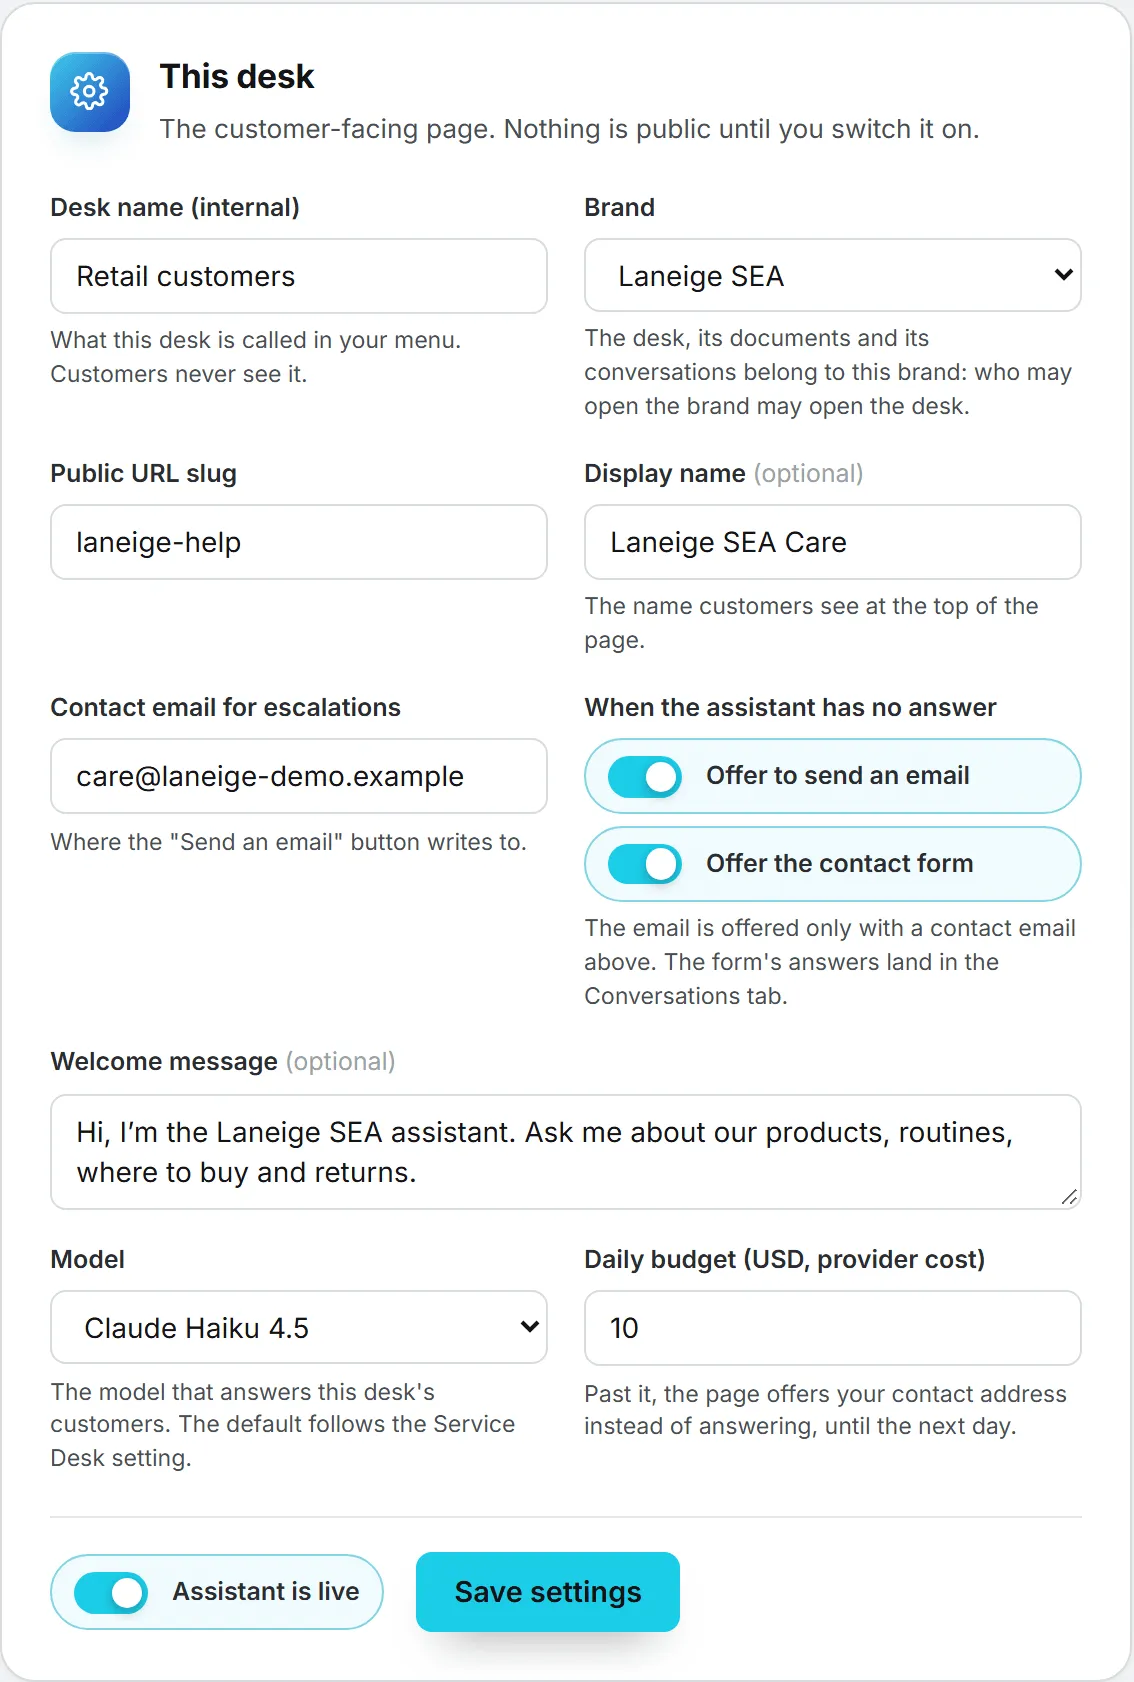
The table lists every field, but you don’t need them all on day one. A slug, a welcome message and a contact email are enough to start.
| Field | What it does | Limits |
|---|---|---|
| Desk name (internal) | The name in your menu and on your pages. Customers never see it. | Required, up to 120 characters |
| Brand | The brand the desk, its documents and its conversations belong to. Whoever can open that brand can open the desk. | Lists the brands of your organization that you can open, including No brand |
| Public URL slug | The end of the public address. The full address shows under the field. | 3 to 60 characters: lowercase letters, digits and hyphens, starting with a letter or digit. Unique across the app |
| Display name (optional) | The name customers see at the top of the page. | Up to 120 characters. Empty means the brand name |
| Contact email for escalations | Where the Send an email button writes to. | Must be a valid address, or empty |
| When the assistant has no answer | Two switches: Offer to send an email and Offer the contact form. | The email is offered only with a contact email above |
| Welcome message (optional) | The assistant’s first message on the page. | Up to 500 characters. Empty means the chat starts blank |
| Model | The AI model that answers this desk’s customers. | Only models your organization offers for the Service Desk |
| Daily budget | Caps the desk’s AI use per day, measured in US dollars. | Above 0 and up to 1,000. Empty means the default of 10 |
Below the fields sit the Assistant is live switch, the Save settings button and a status line.
The band at the top of the page sums up the saved state in four pills: Live or Switched off, the public address, the model, and the daily budget.
Model
The list starts with Default: followed by the model your organization set as the Service Desk default. Keep it and the desk follows that default, even when it changes. The other options are grouped by model maker.
Your organization’s administrators decide which models the Service Desk offers, and which one is the default. See AI models.
If an administrator removes the model a desk was saved with, the desk answers with the default in the meantime. An amber note under the field says so until you pick another model.
Models don’t all cost the same per answer. To compare, ask the same question in the test phone with each model: the cost of every test answer shows under the phone. The default is a sound place to start; switch only when your tests show another model answers noticeably better for the price.
Daily budget
The budget caps one desk’s AI use on customer answers per day. It is 10 US dollars unless you change it, and only answers to customers count toward it: your tests and indexing don’t. Past it, the public page stops answering and offers your contact options instead, until the day resets at midnight UTC. The band at the top shows the budget in a pill marked “a day”. How desks are paid for is in Conversations and costs.
When the assistant has no answer
With both switches on, a customer who gets no answer sees two buttons: Send an email and Fill in the form. The email button opens the customer’s own mail app, addressed to your contact email, with the question already in it. The form collects a name, an email address and a message. The name and the address land on the conversation in the Conversations tab, where it is tagged as waiting for a reply.
Turn both off and the assistant just says it does not have the answer. What the visitor sees in each case is in Public page and website embed.
Switch the desk on or off
Add documents before you go live. Otherwise every customer gets the same reply: the desk couldn’t find it in your documentation.
- Turn on Assistant is live.
- Click Save settings.
The status line reads “Saved. The desk is live.” The pill in the band turns to Live, and Open the public page appears.
To take the desk offline, turn the switch off and save. From then on the public page returns “not found”, and the chat button disappears from websites that carry it. Flipping the switch alone changes nothing: you have to save.
Test the desk before customers do
The phone frame beside the settings shows the public page, and it follows the form as you type, down to the welcome message.
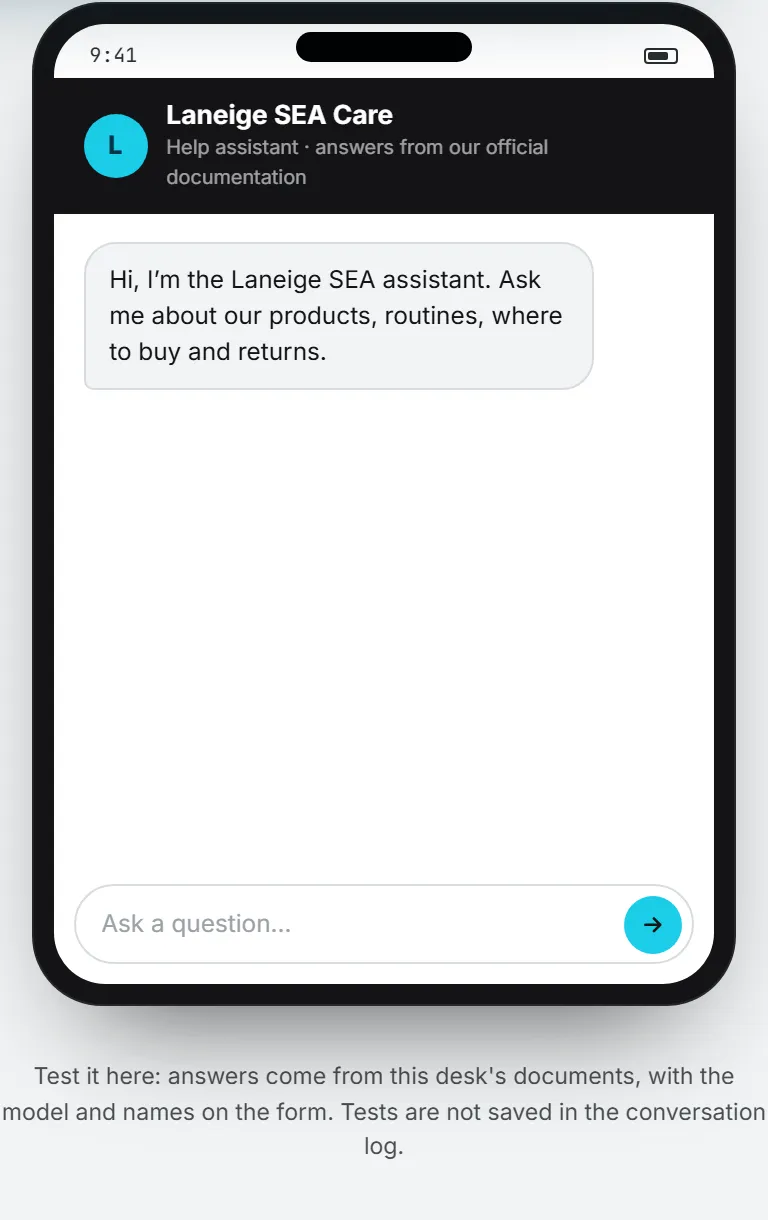
If you can edit the desk, type a question in the phone and press send. The desk answers from its documents with whatever model and names are on the form right now, saved or not. That way you can try a new model or welcome message before customers see it.
Tests work while the desk is switched off, and they never reach the conversation log. Under the phone, the app shows the model and the cost of the last answer, plus the total for the test so far. The person testing pays, so a test is refused when that person has no credits left or hit a spending cap.
- Start the test again clears the test chat.
- In a test, the email button really opens your mail app. The contact form opens but sends nothing.
People without editing rights see the phone as a live preview only. Its question box stays locked, and the settings card has no Save settings button.
The rest of this page covers jobs you’ll do less often.
Move a desk to another brand
- Pick the new brand in the Brand field.
- Click Save settings.
Everything the desk holds moves with it: its documents, its conversations, its linked library folders and its linked websites. Brand access follows immediately, and the page reloads. The slug doesn’t change, so the public address and any website code keep working.
You can only move a desk to a brand of the same organization that you can open, and that brand must have fewer than 20 desks.
Rename a desk
Change Desk name (internal) and save. The page reloads so the menu, the page title and the desk picker show the new name. Customers won’t notice: they see the display name, and the slug stays the same.
Delete a desk
Important: Deleting removes the desk’s knowledge base, its linked library folders and websites, and its whole conversation log, and its public page stops answering at once. It can’t be undone. The files in your Assets Library stay where they are.
- Switch the desk off and save. A live desk cannot be deleted.
- Scroll to the red Danger zone at the bottom of the settings.
- Type the desk name exactly in Type the desk name to confirm.
- Click Delete this desk, then confirm with Delete desk.
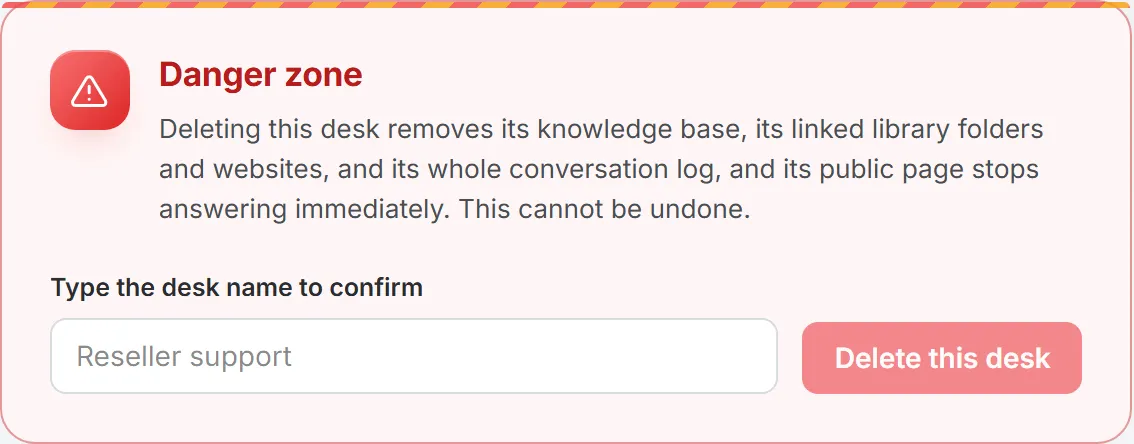
You land back on the Desks page. The Delete link on a desk card leads to the same Danger zone.
Troubleshooting
| Message | What to do |
|---|---|
| “Name the desk first.” | Type a desk name before you create or save. |
| “Could not find a free public URL for that name. Try another one.” | Pick a different desk name. You can change the slug later. |
| “That URL slug is already taken by another desk.” | Pick another slug. Slugs are unique across the app. |
| “The URL slug must be 3 to 60 characters…” | Use only lowercase letters, digits and hyphens. |
| “A brand can run up to 20 service desks.” | Delete a desk you no longer use, or open the desk under another brand. |
| “That contact email does not look valid.” | Fix the address or leave the field empty. |
| “The daily cap must be between 0 and 1000 USD.” | Enter an amount above 0 and up to 1,000. |
| “That model is not offered for the Service Desk. Pick another one.” | The model left your organization’s list. Pick one from the menu. |
| “That brand already runs 20 service desks.” | Move the desk to another brand, or delete a desk in the target brand first. |
| “A desk can only move to a brand of its own organization.” | Pick a brand of the desk’s organization. |
| “This desk is live. Switch the assistant off and save before deleting it.” | Turn off Assistant is live, save, then delete. |