The Instagram studio starts at the visual: make a picture, carousel or reel, write its caption with AI or yourself, then publish within Instagram's limits.
The Instagram studio makes posts the way Instagram thinks of them, with the visual first and the words as its caption. Instagram never publishes copy on its own, so the studio starts at the file. It’s for editors who post on Instagram professional accounts.
Open it from Social, then Instagram, in the left menu. A lot of the studio works the same on every network, and writing posts covers that part. This page is about what’s different on Instagram.
Three steps, visual first
An Instagram post goes through three steps, shown as tiles on the band:
- 01 The picture or the video. Put the visual on the post: made with AI, taken from the library or uploaded.
- 02 The caption. Have AI write what goes under it, or type it yourself.
- 03 Publishing. Send it out, either through the app or by hand in Instagram.
You won’t find a brief step here, because what the picture shows is the brief. Once the post exists, the first tile takes the name of what you made: The picture, The carousel or The reel.
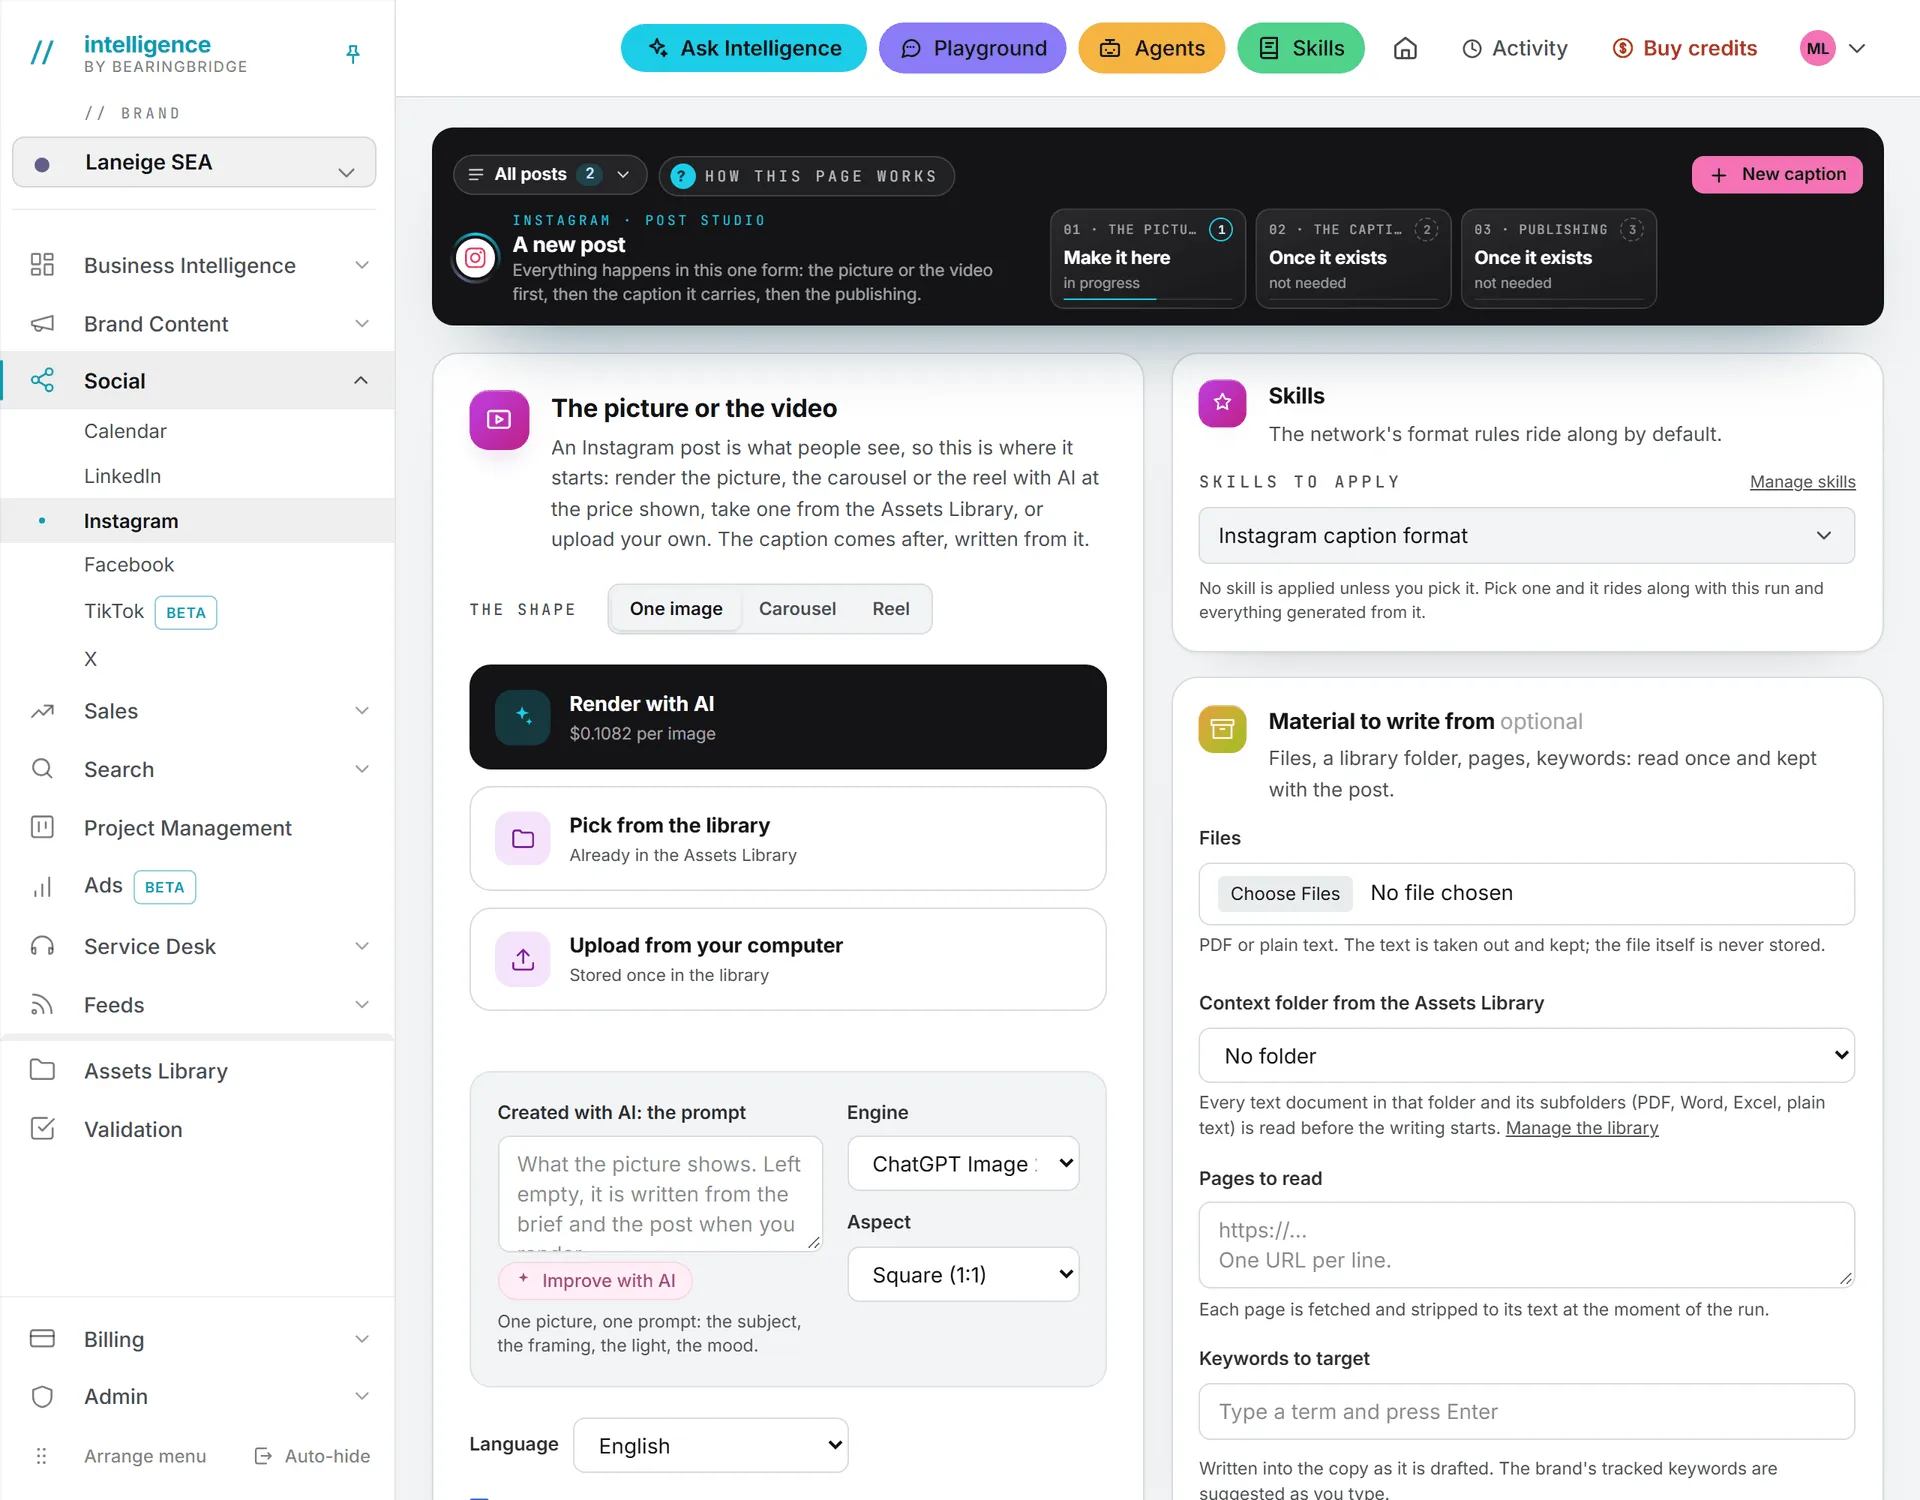
Step 1: the picture or the video
The post gets made on the first card of the page. Start by picking a shape:
| Shape | What goes out |
|---|---|
| One image | A single picture in the feed. |
| Carousel | 2 to 8 slides the reader swipes through. Set the number under Slides. |
| Reel | One clip, published as a reel and shown on the profile too. |
Set the Language of the caption and whether it may use emoticons (Emoticons in the caption, ticked by default). Then use one of three ways in:
- Render with AI. Describe the scene in the prompt box and pick the Engine and Aspect. For a reel, also pick Length, Resolution and, when the engine offers it, With sound. The price is on the button before you press.
- Pick from the library. Use a picture or a clip already in the Assets Library.
- Upload from your computer. The file goes into the Assets Library under this brand, and onto the post.
The post is created the moment you render, pick or upload. Until then nothing exists and nothing is billed, so you can try shapes and prompts freely. The post takes its title from the first line of the prompt, or “Untitled post” with the day’s date.
Only have an idea, no picture yet? Type it into the prompt box and render, or click Improve with AI after a first render to turn it into a better prompt. A post re-purposed from another network arrives the same way: its copy lands in the prompt box.
A picture takes a minute or two to render. A reel takes a few minutes, and you don’t have to wait on the page: the run shows in Activity, and the post keeps the clip when it’s done. Pictures default to a square 1:1 frame and clips to an upright 9:16 frame.
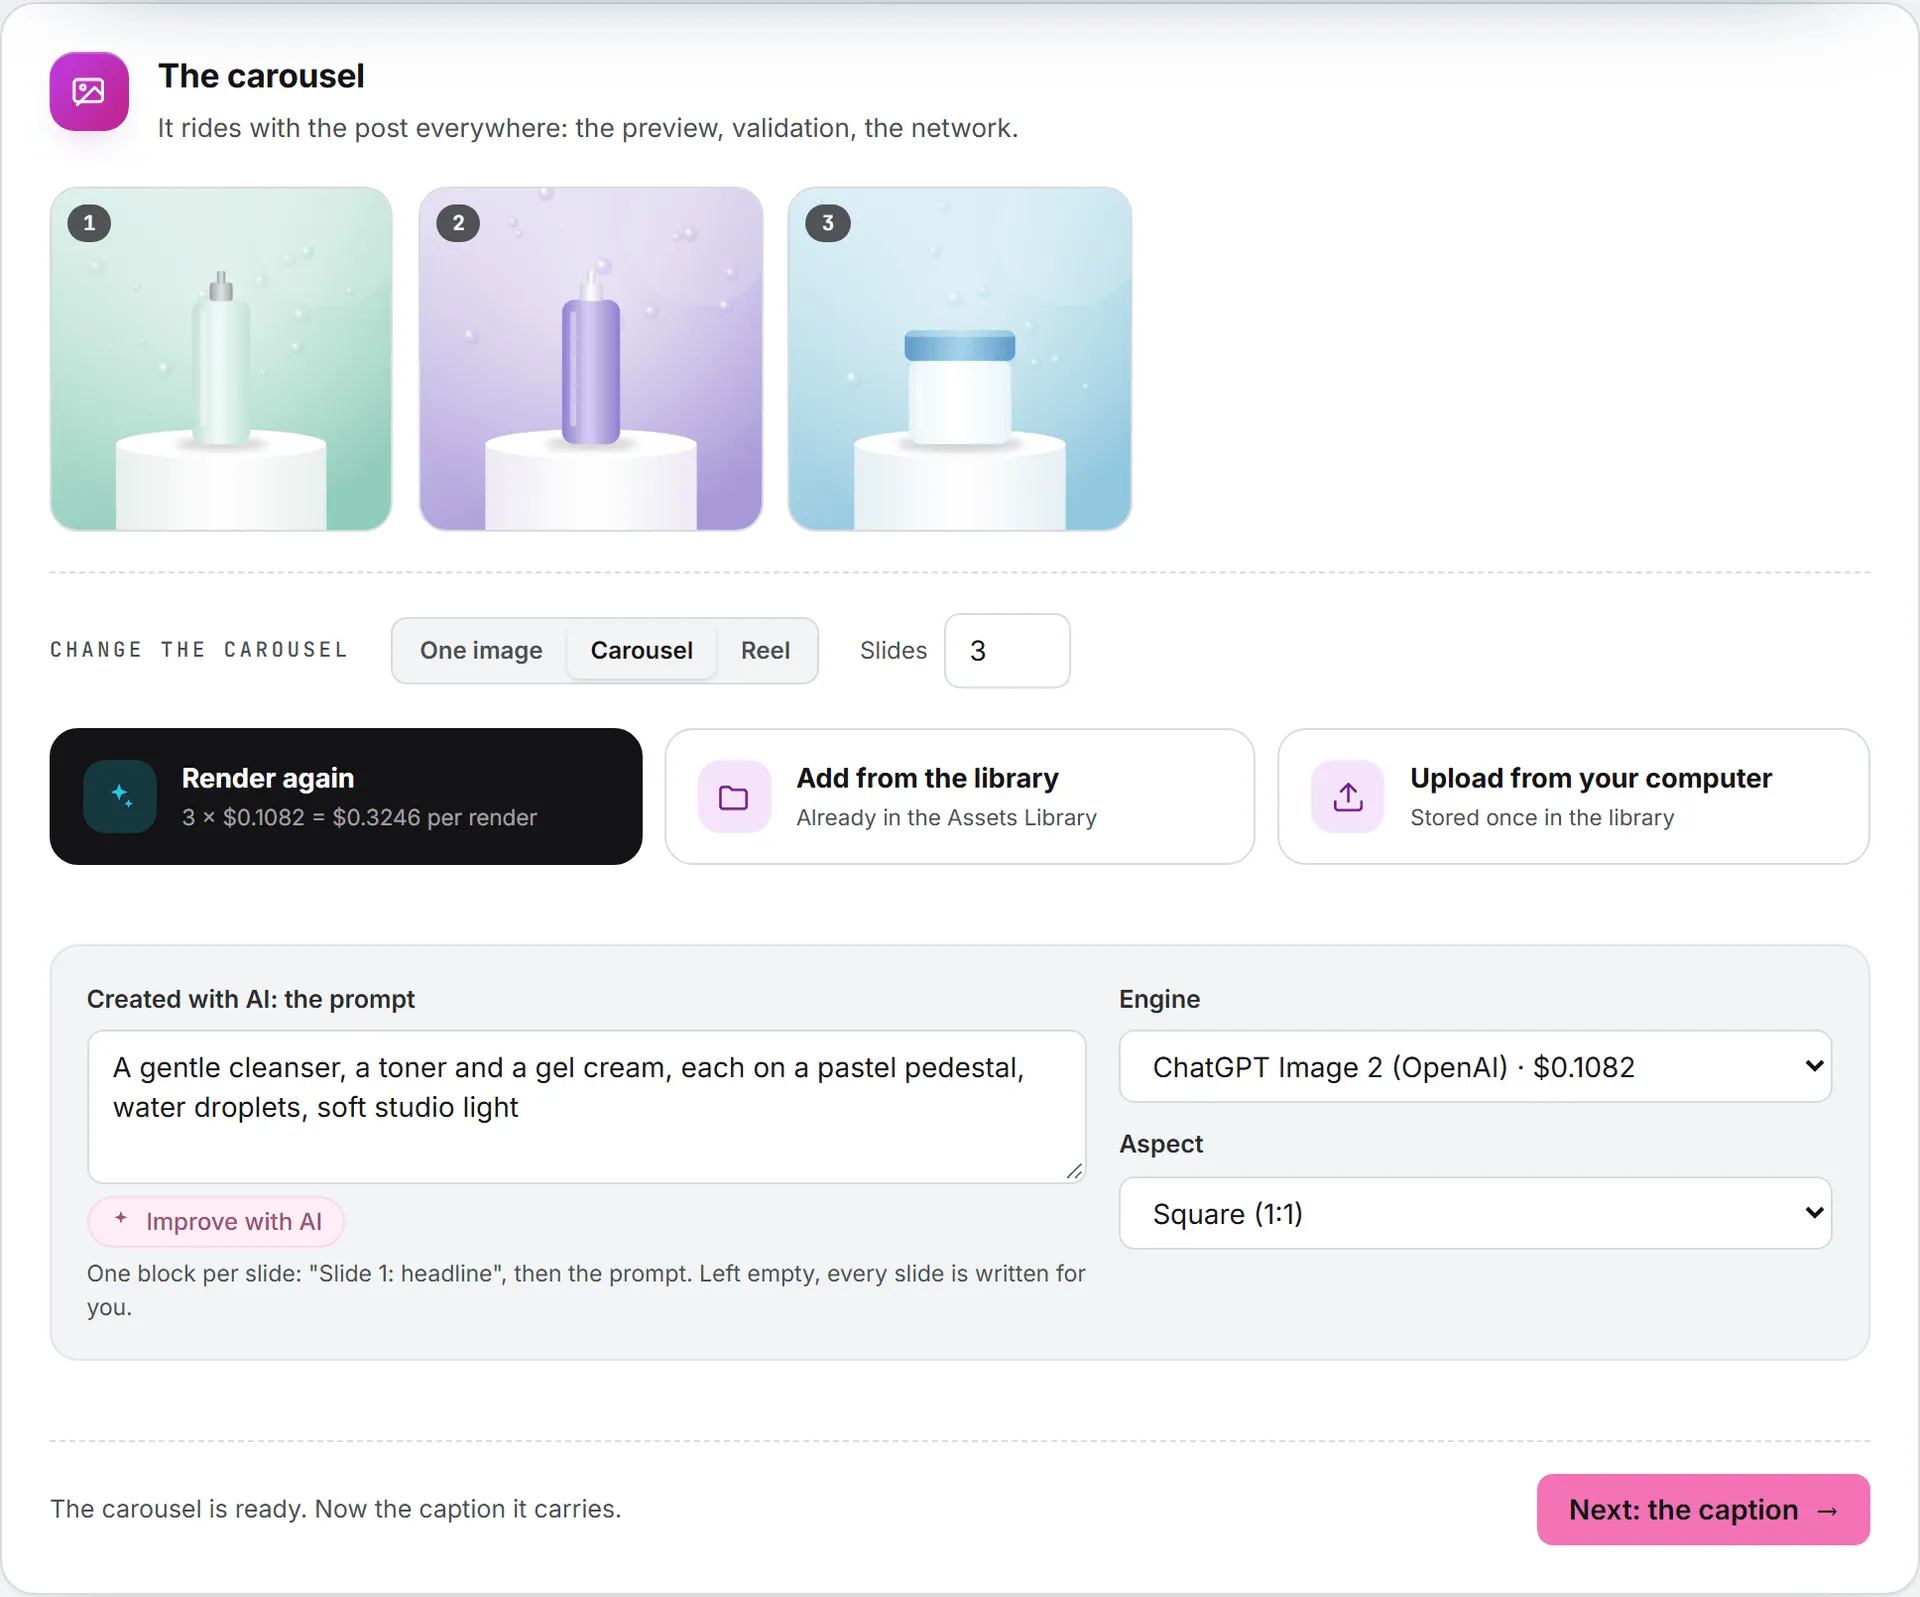
Once the post exists, Improve with AI under the prompt rewrites it into an engine-ready prompt. It’s billed, and the cost shows next to it. You can also change the shape later, render again, add slides from the library or take a picture off. See writing posts.
Step 2: the caption
With the visual in place, the words come next.
While the caption is still empty, the step opens on a Write the caption box. Type anything the caption must say (an offer, a date, a call to action) and click Write it with AI, or leave the box empty and it’s written from the visual’s prompt alone. The model list next to it shows what each model costs.
Or skip the AI and type the caption straight into the editor below it. As soon as there’s a caption, the Write the caption box goes away and the editor takes over.
After that, the caption behaves like any post’s copy. It saves itself as you type, and you can ask for Write another version or rewrite a highlighted passage. The Instagram caption format skill guides the writing: a hook in the first line, 60 to 150 words, line breaks between ideas and 5 to 10 hashtags at the end. Instagram captions aren’t checked and repaired after drafting the way LinkedIn and X posts are.
Step 3: publishing
On the Publish automatically tab, What Instagram asks for holds the shape Instagram gets. A picture or a carousel can go out as a Feed post or as a Story, and a story carries the first picture only, with no caption. A clip always goes out as a Reel, shared to the profile grid as well as the reels tab, so there’s no choice to make.
On the Publish manually tab, Publish interactively opens Instagram in a new tab. Instagram’s website asks for the picture first, and the caption goes in after it. With one picture, the picture rides on your clipboard and the caption is downloaded as a text file; press Copy the text to put the caption on the clipboard once the picture is in. With several slides, the slides are downloaded as files to drag in, in order, and the caption waits on the clipboard (and in a downloaded text file, as a spare). No hour can be picked this way, and the app never hears that the post went out.
Everything else on this step, from the queue to editing a post that’s already out, is shared with every network and covered in publishing.
Instagram’s limits
Most refusals on Instagram trace back to one of these numbers.
These are the figures Instagram publishes for posts sent through its API. The studio only offers what Instagram accepts, and it checks the post again before it’s queued.
| Rule | Limit |
|---|---|
| Caption | 2,200 characters |
| Hashtags | 30 |
| Pictures | JPEG only, up to 8 MB each |
| Carousel | 2 to 10 pictures on Instagram. The studio renders and uploads up to 8. |
| Reel | MP4 or MOV, up to 1 GB, from 3 seconds to 15 minutes |
| Posts per account | 100 in any 24 hours |
Important: Instagram’s publishing takes JPEG pictures only. Some image engines render PNG files, and uploads can be PNG too. The app checks this before a post is queued and tells you which file to replace. Publishing manually isn’t affected.
Who can do what, and what it costs
Editors and above make and publish posts. Viewers can open the studio and read them, nothing more. Rendering is billed at the price shown on the button: per image for pictures, and per second of the length you pick for a reel, and writing or rewriting the caption with AI is billed with its cost on the status line. Publishing on Instagram through the app is free. See what costs credits and roles and rights.
Connect your Instagram account
If you want the app to post for you, connect your account on My connections. It has to be a professional account first: in the Instagram app, go to Settings, then Account type and tools, and switch to Business or Creator. No Facebook page is needed. The connection is renewed every day, and only lapses if it stays disconnected for 60 days.
Troubleshooting
“This network needs at least one picture on a post like this.” Instagram publishes nothing without a visual. Add one on step 1.
”… is a .png file and this network takes jpg, jpeg.” Instagram’s publishing takes JPEG only. Upload a JPEG version of the picture, or publish the post yourself on the manual tab.
“… runs 16 minutes and this network takes 15 minutes at most.” The reel is too long for Instagram (the numbers in the message are your clip’s and Instagram’s). Trim it and upload it again, or render a shorter one.
“A carousel on this network needs at least 2 pictures.” Add a second slide, or switch the shape to One image.
Improve with AI answers with an error on the first card. It needs the post to exist. Render, pick or upload first, then improve the prompt and render again.